| Figure 1 |

|
|
This page is based on the installation of R on a Windows 8.1 computer using the Firefox web browser.
The process took place on July 6, 2015. The standard version of R
at that time was 3.2.1.
Please understand that web pages change, software changes,
and installation systems change. Thus, what is recorded here, although true at the moment of
recording, may have changed by the time you read this.
Also, as I hope is obvious, the images below have been annotated, in GREEN, to show you where you need to point and click. |
To install R, we will go to the Comprehensive R Archive Network at the cran.r-project.org web site. This should open a page, the top of which should appear as shown in Figure 1.
| Figure 1 |
|
|
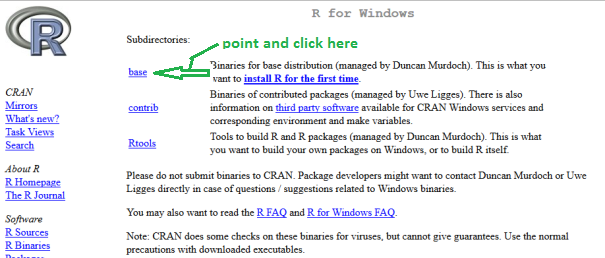
Since we are trying to install R on a Windows machine, we will click on the "Download R for Windows" link on that page. Doing so should take us to a new page, the top of which is shown in Figure 2.
There are three choices for us and for this course it will be enough to download and install the base system. Therefore, click on the base link on that page.
| Figure 2 |
|
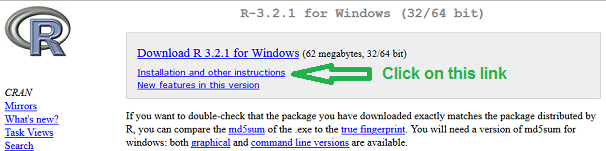
Selecting the base link in Figure 2 takes us to the page shown in Figure 3. There we want to select the Download R 3.2.1 for Windows option. Doing so will start the download process.
Note that we will return to this screen, the one shown in Figure 3, later in Figure 16.5 when we want to look, for just a moment, at the Installation and the instructions option.
| Figure 3 |

|
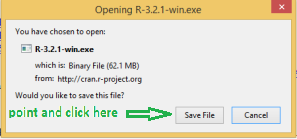
Once the download process starts then you may see any number of different things depending upon the browser that you are using and the settings for that browser. As noted above, this particular set of screen captures was done using the Firefox browser. In Figure 4 the browser is asking if it should save the file. We want to do this so click on the Save File button.
| Figure 4 |
|
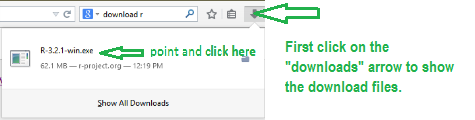
Once the download has completed you want to run the file that you have downloaded to your computer. If you are using Firefox, then there is an icon on on the bar at the top of the screen that, if pressed, will show you the list of downloaded files. Furthermore, you can click on such a file to get the computer to "run" that file. That is exactly what we did for Figure&5.
Note that if you are using a different browser, Internet Explorer, Opera, Safari, Chrome, etc., then there will be some way for you to do the same thing. Even if you cannot find that similar way, you could use the File Explorer to find the file. It will most likely, but not always, be in the Download directory. Once you have started to run the program it will open the screen shown in Figure 6.
| Figure 5 |
|
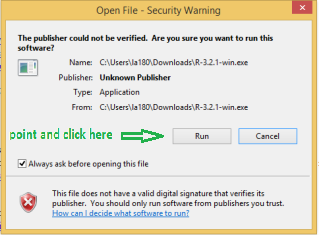
Once you have started to run the program Windows will most likely open the screen shown in Figure 6 to askingif you really want to run this file. Of course we do. Therefore, click on the "Run" button.
| Figure 6 |
|
[Note: Figure 7 left as missing.]
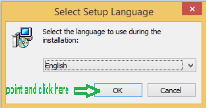
Running the program opens a new window to ask our choice of language. This installation assumes that we want English. Therefore, click on the "OK" button as shown in Figure 8.
| Figure 8 |
|
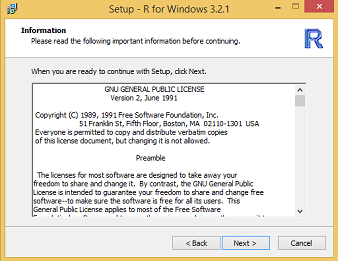
Now we start the real installation of R. Figure 9 provides the introduction to the installation process. We click on the "Next" button to move to Figure 10.
| Figure 9 |

|
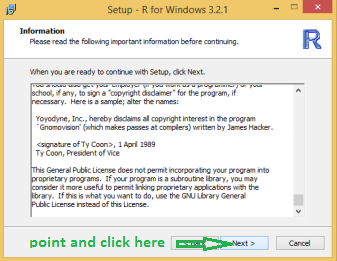
Figure 10 gives the licensing information. We are expected to read this, and understand it.
| Figure 10 |
|
You might notice that I have read the document, moving the slider at the right of the window all the way to the bottom. Once you have done so to your satisfaction, click on the "Next" button to go to Figure 12.
| Figure 11 |
|
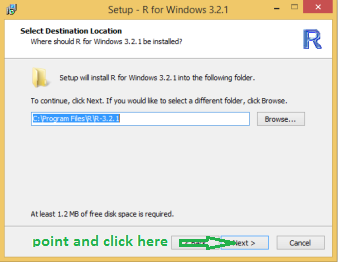
At this point the installation program asks for the location into which the program files are to be placed.
| Figure 12 |
|
The default, and usual, location, namely, C:\Program Files\R\R-3.2.1, has already been provided. It is probably best just to leave it that way and just press the "Next" button to continue to Figure 13.
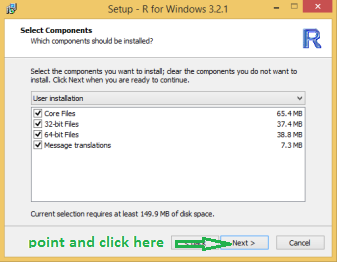
Figure 13 gives you the option to install all or just some of the components of the package. In most cases there is nothing wrong with just installing all of the components. However, there is a bit of waste in doing so. Your computer is running either a 32-bit operating system or a 64-bit operating system. If you do not know which it is, or you just want to verify that what you "know" is correct, you can ask the computer for that information. [Look at this on Windows 8; Look at this on Windows 7.]
If you are concerned about wasting a little disk space then you only need to install the version of R that aligns with the type of your operating system. Thus, if you are running a 64-bit operating system you could uncheck the 32-bit system in the option list in Figure 13. Similarly, if you are running a 32-bit operating system, then you could uncheck the 64-bit system in the option list shown in Figure 13.
| Figure 13 |
|
Once the options of Figure 13 have been appropriately set, click on the "Next" button to move to Figure 14.
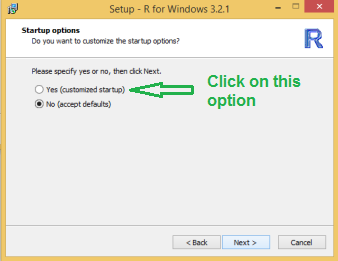
In Figure 14 you are given the choice of setting the startup options. The default is to just use the standard settings., that is to not customize the settings. It would be perfectly fine to accept this option and just press the "Next" button, which would then jump to Figure 21. However, for this presentation we will change the option to "Yes (customize setup)" so that we can look at some of the options. Click on the "Yes (customize setup) option.
| Figure 14 |
|
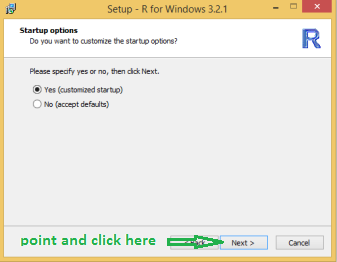
Once you have changed the selection to "Yes (customize setup)" your screen should look like Figure 15.
Click on the "Next" button to move to Figure 16.
| Figure 15 |
|
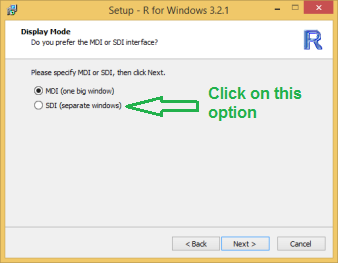
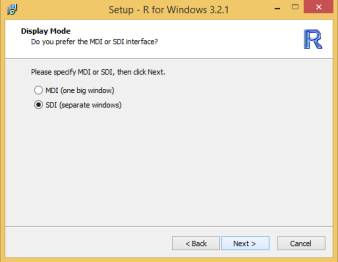
Figure 16 shows a window that gives us on option between MDI and SDI, a choice that makes no sense to us and for which we are just not prepared.
We will want to select the second option, SDI and Figure 16 indicates that we should make that selection. However, before we move off of the screen shown in this Figure, let us take a small diversion to see what these options are doing.
You may recall, back in the discussion just above Figure 3, that we said we would want to return to that screen at about this point. Let us go back to that screen.
| Figure 16 |
|
Back then, when we were using the screen in Figure 3 to select download the software, one of the other options was to look at Installation ond other instructions. In Figure 16.5 we want to click on that option.
| Figure 16.5 |
|
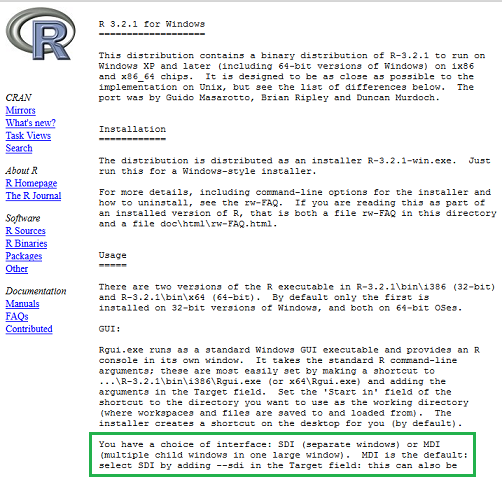
This will open a window packed with more information. Looking down that window you should find the text that I have boxed in green in Figure 17.
| Figure 17 |
|
That text at least gives us some idea of the meaning of MDI and SDI. As noted in Figure 16, for this installation we will choose the SDI option so our screen should now look similar to the window shown in Figure 18. Click on the "Next" biutton to accept the option and move to Figure 19.
| Figure 18 |
|
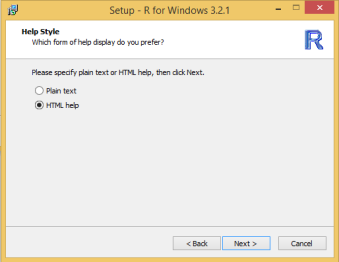
The R system includes a tremendous amount of "help" information. Our choice in this window is whether we want that "help" to be in plain text or a little more pretty in HTML format. We can leave this setting the way it is and just click on the "Next" button.
| Figure 19 |
|
Figure 20 gives us a choice of how we will use the Internet. Again, unless there is some special reason that you face, we will leave the setting as is and just click on the"Next" button.
| Figure 20 |

|
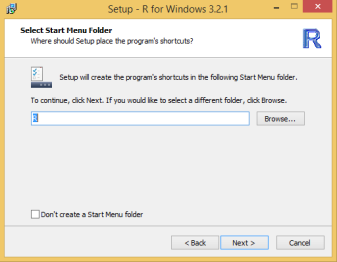
The screen shown in Figure 21 allows us to change the setting for the creation and location of shortcuts. Unless you are trying to hide R from someone, there is no reason to change the settings on this screen. Just click on the "Next" button.
| Figure 21 |
|
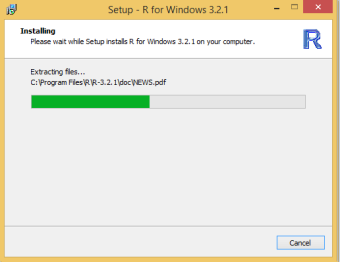
The installer starts the process, and as illustrated in Figure 22, it will keep you posteed on the progess of the installation. In general, this is not a long process. Once it has completed the window shifts to that shown in Figure 23.
| Figure 22 |
|
Figure 23 just lets us know that the installation process has completed. There is nothing to do here other than press the "Finish" button.
| Figure 23 |

|
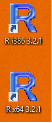
Once the installation process is complete, and assuming that you asked, back in Figure 13, to have both the 32-bit and 64-bit versions installed, you should find the R icon on your desktop. For th instllation traced here we asked for both systems and therefore we have two icons, shown in Figure 24, on the desktop. The legend below each icon identifies if it is for the 32-bit or 64-bit system. Note tha the 32-btsystem is designated by "R i386 3.2.1" whereas the 64-bit system is designated by "R x64 3.2.1".
| Figure 24 |
|
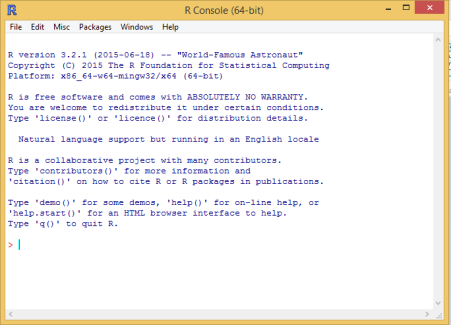
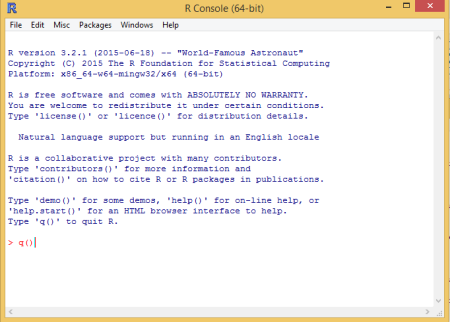
At this point we will try to at least run R. We will double click on the R x64 3.2.1 named icon on the desktop to bring up the window shown in Figure 25.
This is the openning "splash" screen that R shows whenever we start it. Note the region highlighted by the green box in Figure 25. This just confirms that we are indeed running the system that we thought we were.
Reading further, toward the bottom, you will see that there are even hints on how to get a demo, how to get help, and even how to quit. We will just quit the system.
| Figure 25 |
|
Using the method given in Figure 25, we will just type
q() at the prompt on the window. This is shown in Figure 27 below.
[Note that Figure 26 is omitted.]
| Figure 27 |
|
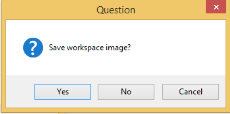
Quitting R is not a step to be taken lightly. Therefore, R takes this opportunity to ask if you are really serious (you could "Cancel" the action) and if you are serious, then do you want R to save the "workspace". Saving the workspace should allow you to restart R later and at least restore any values (i.e., work) that you have done to this point. We will talk about this in more detail in a later web page.
We have not done anything so we might as well just tell R not to save the workspace by clicking on the "No" button.
| Figure 28 |
|
That closes R and ends the task of installing R on a Windows computer.