Figure 01
|
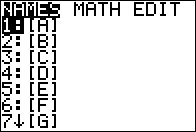
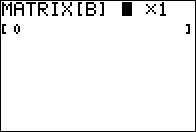
Use the sequence
  to
open the MATRIX menu
shown in Figure 01. to
open the MATRIX menu
shown in Figure 01.
|
Figure 02
|
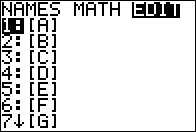
Use the  sequence to
highlight the
EDIT option as shown in Figure 02. sequence to
highlight the
EDIT option as shown in Figure 02.
The first matrix that we want to enter,  ,
will go into the [A] matrix on the calculator.
That is the name, in Figure 02,
that is already highlighted.
Press ,
will go into the [A] matrix on the calculator.
That is the name, in Figure 02,
that is already highlighted.
Press  to have the calculator move on to
Figure 03. to have the calculator move on to
Figure 03.
|
Figure 03

|
Matrix [A] had not been defined in Figure 02.
However, once we move to
Figure 03 [A] is given the initial value of being a
1 x 1 matrix with its single value being 0.
However, the calculator cursor is at the "row" dimension of
the specification. We want this to become a 2 x 3 matrix.
Therefore we press

 to change the matrix dimensions and move to Figure 04.
|
Figure 04

|
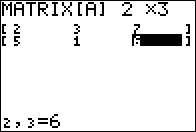
Now we can see that the matrix has the correct
dimensions. We are left with the task of entering the required values via


 and and
 to move to Figure 05.
|
Figure 05
|
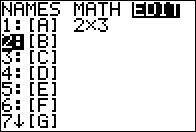
We are done with matrix [A] and we are ready to
start entering the information for matrix [B].
We can leave Figure 05 and move to Figure 06 by using
to open, anew, the MATRIX menu, and then
to move to the EDIT option. Once there
we use  to move the highlight to the [B]
option, as is shown in Figure 06. to move the highlight to the [B]
option, as is shown in Figure 06.
|
Figure 06
|
Before we continue, it is worth noting that we now have
matrix [A] defined appropriately in Figure 06.
To start working on [B], since it is the highlighted option,
we need only press
.
|
Figure 07
|
We want to enter  which means that we need to change teh dimensions to be 3 x 2.
|
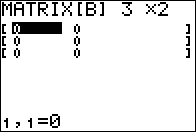
Figure 08
|
Once this is done we see, in Figure 08, the appropriate arrangement of cells and
the fact that they all start holding the value 0.
|
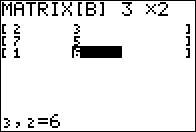
Figure 09
|
We fill in the desired values.
Once completed we can reopen the MATRIX menu via the
sequence.
|
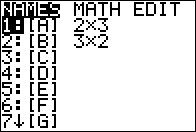
Figure 10
|
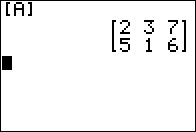
We want to display the contents of [A], the highlighted name.
Therefore, we press key to paste the name, [A]
onto the main screen shown in Figure 11.
|
Figure 11

|
Now with the name present we press
yo have the calculator
display the matrix.
|
Figure 12
|
The result is shown in Figure 12. Note that this
calculator was in MATHPRINT mode so the matrix looks rather pretty.
|