 2x + 5
  8
8 This page looks at Example 16 from Chapter 1 Section 2. The problem in that example is
 2x + 5
  8
8  2x + 5
and 2x + 5
  8
8
|
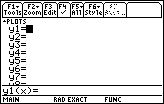
We start entering the inequality on the "y=" screen.
The
  keys open the "y=" screen
shown in Figure 1. keys open the "y=" screen
shown in Figure 1.
The TI-89 evaluates inequalities as TRUE
or FALSE. Furthermore, these are "logical" or "boolean" values, and on the TI-89 there
is no numeric representation for such values.
The function "tester()" has been written to evaluate such "boolean" expressions and
to produce a 1 if the expression is TRUE and a 0 if the expression is FALSE.
Once it has been loaded onto the calculator, we can find the "tester()" function by
pressing the |
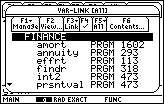
| Figure 2 shows the start of the "VAR-LINK" window on this
calculator. The contents of the window will change on each calculator as
new variables, programs, and functions are defined on the calculator.
We could use the cursor keys to move down the list of variables, programs,
and functions looking for the tester() function.
However, pressing the  key will move the display to the next
entry that starts with the letter "t". key will move the display to the next
entry that starts with the letter "t".
|
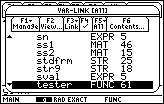
| We seem to be in luck on this calculator. The highlight has moved to the desired "tester" function. |
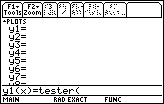
| We select that highlighted item from Figure 3 and paste it into the function entry and edit
line by pressing the  key. The result is shown in Figure 4. key. The result is shown in Figure 4. |
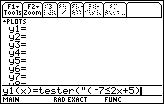
| First we produce the openning quotation
mark via the   keys.
Then we start to construct the inequality inside quotation marks. keys.
Then we start to construct the inequality inside quotation marks.
   produces "(– 7".
The next character that we need to enter is the "less than or equal to" character.
We can do this via
the
   keys.
And we can finish the first portion of the inequality with the keys.
And we can finish the first portion of the inequality with the
 
   keys. keys.
|
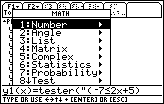
| At this point we need to generate the " and "
for our statement. There are many ways to do this. One way would be to
enter the spaces and the letters using the keyboard in alphabetic mode.
Another way would be to open the CATALOG and select the " and "
from there. A third method is to use the MATH menu. We will demonstrate that third method.
Press |
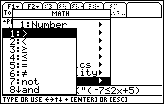
| Here, in the Test sub-menu, we can see that "and" is the eighth
choice. Thereofre, we press the  key to make that selection. key to make that selection. |
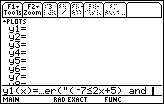
| The calculator has taken our choice and has pasted the " and " at the end of our function. |
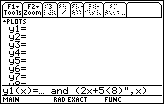
| Now we can complete the function via


  . .
|
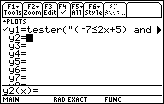
| Pressing the  key accepts the function, placing it in the top portion of
the window. key accepts the function, placing it in the top portion of
the window.
In preparation for actually graphing the function we move to the ZOOM
window by pressing |
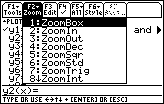
| In Figure 8 we have the various Zoom options.
We will select ZoomStd by pressing  .
This will move us to the graph window shown in Figure 9. .
This will move us to the graph window shown in Figure 9. |
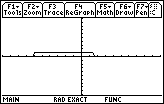
| Figure 9 demonstates the solution, the half-closed, half-opened
interval |
As noted on other web pages, the graph shown above, although correct and although it does a good job of showing where the inequality is TRUE, does not do a good job of showing where the inequality is FALSE. This is so because the value FALSE is associated with 0 by the tester() function on the TI-89 and as the calculator plots those 0 values the graph is on top of the x-axis. Therefore, we do not see any change to the graph as the 0 values are plotted. The scheme that we have used before to emphasize the TRUE and FALSE values is to multiply the entire function by 3 and then subtracting 1. As a result, TRUE is plotted as 2 while FALSE is plotted as – 1. The following images show the conversion of the formula and the resulting graph.
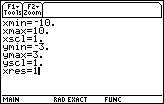
| First we will prepare the way for our final graph by adjusting the WINDOW settings.
We can move to Figure 10 by pressing the   keys, and then using the cursor keys to move down and to
change yMin to – 3, ymax to 3,
and xres to 1.
|
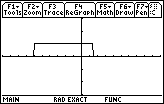
| The   keys move the display back to the
graph. We can see the consequences of our changes in Figure 11. keys move the display back to the
graph. We can see the consequences of our changes in Figure 11.
We need to move back to the "y=" screen to make the changes to the function noted above.
Therefore, we press |
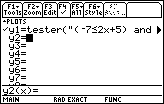
| In Figure 12 we are back in the "y=" screen. The highlight is on
the "y2=" line. We want to edit the function "y1=". Therefore, we use the
 key to move the highlight. key to move the highlight.
|
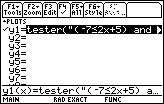
| In Figure 13 we have the highlight on the function that
we want to edit. However, we need to press the  key to move the highlight
down to the function entry and edit line. key to move the highlight
down to the function entry and edit line. |
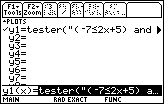
| We want to multiply this function by 3 and then subtract 1. Do do
this we want to move to the right end of the function. Because the enitre function
is highlighted in Figure 14, we can press the
 key once to move to the right end of the function. key once to move to the right end of the function.
|
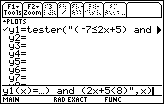
| In Figure 15 we are finally in place to make the desired change. |
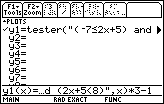
| We generate the change by pressing the
 
  keys.
keys.
To accept the change we could press the ENTER key. However,
our desire is to accept the change and move directly to the graph.
We can do this by pressing the |
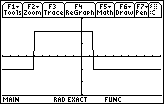
| Figure 17 displays the changed function. On this graph we can see clearly the area where the inequality is FALSE (resulting in 0*3–1 or – 1) and where it is TRUE (resulting in 1*3–1 or 2). |
PRECALCULUS: College Algebra and Trigonometry
© 2000 Dennis Bila, James Egan, Roger Palay