A computer file system is organized as a collection of directories (also called folders). Naturally, there are system facilities to help us look at and manage the files in these directories. On a Windows system, one such facility is the Windows Explorer.
| This web page starts with the thought that R has never been run on this computer. That is probably not the case on your computer. For one thing, we started R during the installation process just to be sure that it was installed correctly. Therefore, it may make more sense just to start really reading this web page after Figure 8 and before Figure 9. The goal there will be to create a separate directory to hold our particular project. The material before that point merely walks us through the default case. |
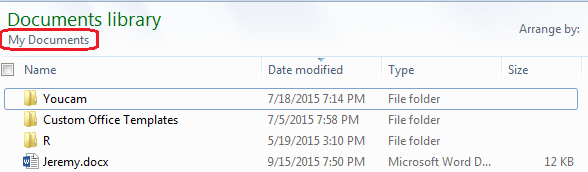
Figure 1 is shown here just so that you can see the initial state of the My Documents folder before we take any of the actions shown below.
Now, we will run a quick R session,
as we do via RStudio in Figure 2,
give it two commands, namely test_val <-23
and scores<-c(94,93,94,96,98,90,93,91),
follow that with the q() command to quit the session, and then
respond with y to the question about saving the workspace.
All if this is shown in Figure 2.

There are two things to note in Figure 2. First, we see that there is no extra information between the end of the R splash screen and the first R prompt for a command. We will see a different start to an R session in Figure 4. Second, in the final question about saving the workspace image, R has told us that if we want to save it then R will save it to ~/.RData.
We responded with y so let us look at the result. In Figure 3 we return for a new look at the My Documents folder.

Comparing Figure 3 with Figure 1 we see two new files in the directory. These are files that R has created from the very short session that we saw in Figure 2. We will see the effect that these fines have on R when we start another R session, again using RStudio. The "splash screen" is shown in Figure 4.
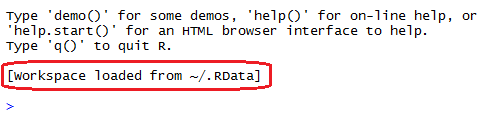
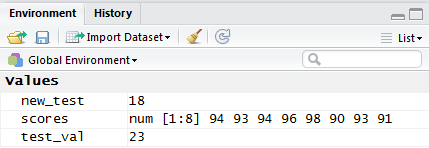
In Figure 4 we see a new line that shows up immediately after the old "splash screen" and the R prompt for us to enter a command. That new line tells us that not only has R started, but that the workspace that we saved back in Figure 2, and that we saw in Figure 3 has been loaded. As a consequence, the variables that we defined in Figure 2 have been restored. We can see that by looking in the Environment pane in our RStudio session. Figure 5 was taken from that pane.
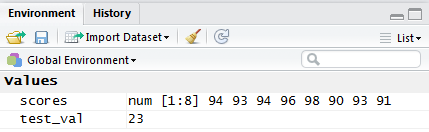
Indeed, the variables defined back in the previous session, have been retrieved, just as if we had not even left that old session.
What has happened here is that R, in Windows, starts up, assuming that we have not told it otherwise, with the working directory set to be the My Documents directory. Then, at the end of the R session, R saves, if we ask it to do so, any variables that it is holding, in a file in that working directory. If, at a later time, we restart R, then R reads, from the working directory, the information that it has saved earlier, and from that information R can and does restore the variables.
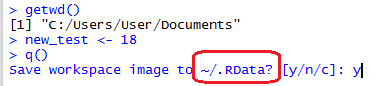
The working directory is where R will look for and store any files that it needs. We can even ask R to tell us the name of the working directory. The command getwd() tells R to "get the working directory". Since that command is serving as an expression, R will display the value, that is the name of the working directory, that it found. In Figure 6 we continue the session that we started in Figure 4 and we give the getwd() command.
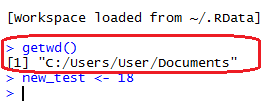
The result of this command is that R displays the working directory, in this case C:/Users/User/Documents, which is another name for the My documents folder.
Also, in Figure 6, we see that we have defined a new variable. Looking at the Environment pane in Figure 7 we can see that new variable listed.
Now we will conclude the session from Figure 6 with the usual q() command, and we will save the workspace by answering the question with a y. This is shown in Figure 8.
Then, if we return to look at the contents of My Documents, shown in Figure 9, we see that we have new versions of the two special R files. We can tell that they are new by comparing their modification date with the same named files back in Figure 3
What we have seen so far is that without our intervention, R is going to use a directory on the system to hold the workspace files, and once those files exist, R will read the files in our working directory whenever we start R, restoring our workspace. This is nice, but, at least for me, I would prefer to have more control over what R is doing. In particular, I may well be working on four, five, or more projects at the same time. I like having R save variables, but I want to keep separate variables for separate projects.
One way to do this is to create a separate directory for each project, and to place a more or less trivial R-script file in that directory. Then, we can start R by telling the system to open the software associated with that file. Doing so will make the directory holding that file become the working directory. Let us step through such a process.
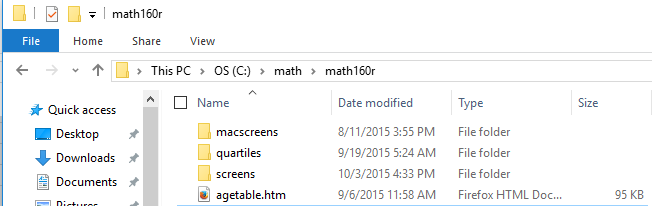
First we will create a new directory to hold our current project. In my case, I already have a directory called math, and it holds a subdirectory called math160r. Figure 9 shows us using Windows Explorer to look at the directory C:/math/math160r.
What we want to do is to create a new subdirectory here. On my system I can do this by right-clicking the mouse in the area on the lower left of the window. That opens a small box, shown in Figure 9a.
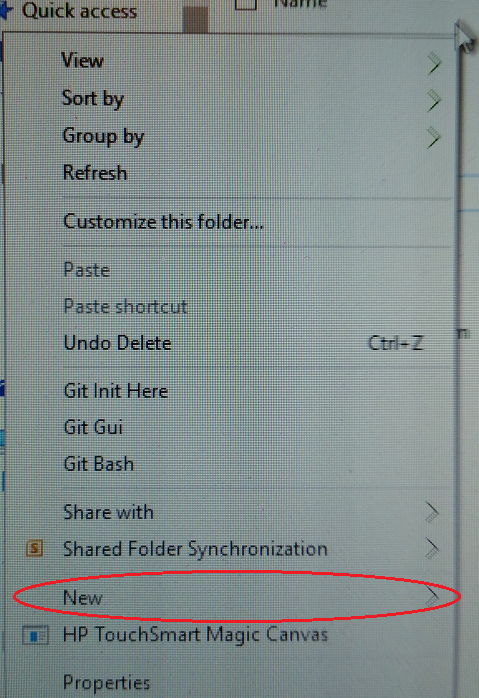
At the bottom of that box is the option New. I point the mouse at that option and another pane opens, as shown in Figure 9b.
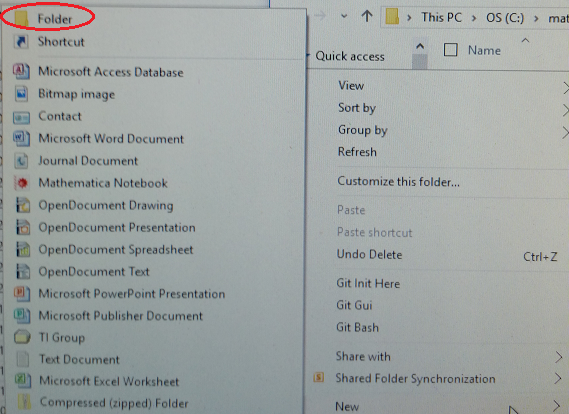
Here I select the option Folder, and that creates a new folder in the C:/math/math160r directory, and the new directory has the provisional name New folder. We see this in Figure 9c.

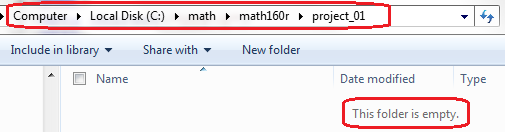
We can change the name of that folder to project_01 and then select it to open it in Windows Explorer, only to see, as in Figure 10, that there is nothing in that directory.
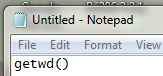
The next step is to create a simple text file that contains a simple R command, and to save that file in the new directory. To do this on a Windows machine I can start Notepad, write the one line getwd() and then save that file in the new directory. Just a snippet of the Notepad window is shown in Figure 11.
Then, using the Save As option under the File menu item, we get a screen similar to the one shown in Figure 12.
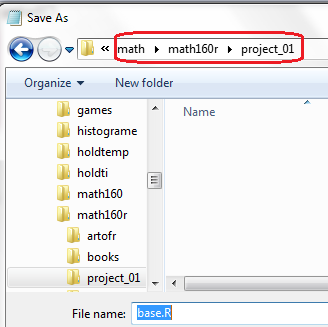
Note that we are going to be saving the file in the desired directory (the path to that director is circled at the top of the screen), and that we have named the file base.R, shown in the File name field at the bottom of the screen.
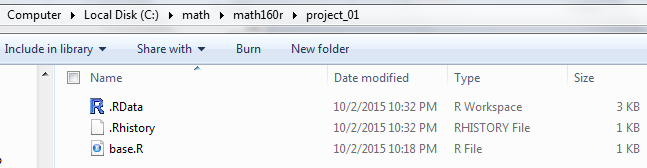
Once we have saved the file we can return to look at the directory project_01. The Windows Explorer window for that directory is shown in Figure 13.
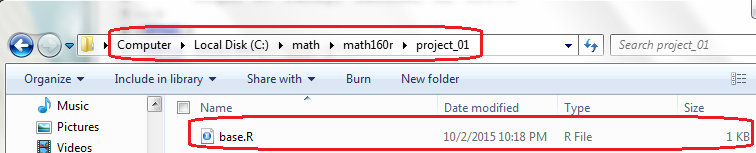
We can see, in Figure 13, that our new file is now in the directory.
An alternative method for getting the same file into the director is to copy it, or download it, from some other location. In particular, the link this is the file is a link to a copy of that same file. If you were to "right click" on that link and select "Save Link As..." as the action, then your browser would copy the file to your computer. Of course, you might still have to copy it from one place to another on your machine, but that will depend upon the settings that you use with your browser.
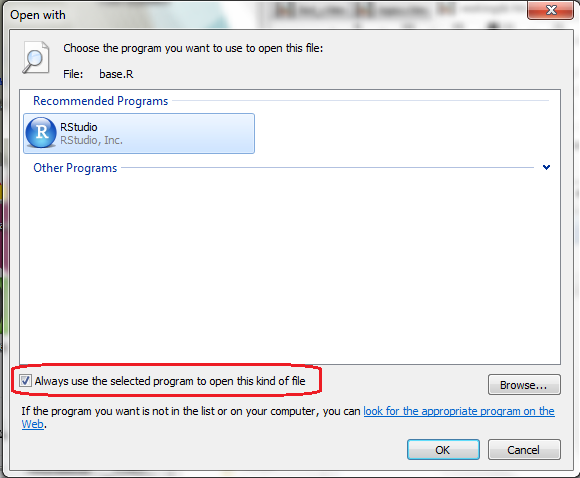
On the machine that was used to prepare this web page, files that have the .R extension, as base.R has, will automatically be opened by RStudio. We can see that in Figure 13 by looking at the small icon that appears just before the file name. If this is not the case on your machine, or if you just want to be sure, you can "right click" on the file name, and select the "Open with..." option. Various versions of Windows will respond in various ways to this. This particular version gave me the screen shown in Figure 14. You will want to select the RStudio option and be sure to check the "Always use the selected program to open this kind of file" box on the screen before clicking the OK button.
Once RStudio opens we will see the usual "splash screen" in the Console pane. This is shown in Figure 15.

Note that there is no indication that R has loaded an existing workspace because there is no workspace stored in this directory.
Also, we now have a new pane, the Source pane, that is showing the base.R file under its own tab. This is shown in Figure 16.

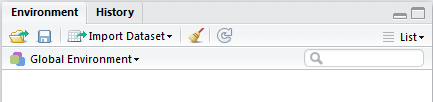
And, as we should have expect, there is nothing in the Environment pane, shown in Figure 17.
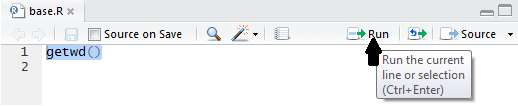
Indeed, that simple sequence has caused the highlighted command to be copied to the Console and it has been executed as per Figure 19.

Furthermore, by executing the command we see that the working directory is our desired project_01.
Then, just to further this demonstration, let us assign the value 41 to the variable a. Affter that we will quit this session and tell R to save the workspace. All of this is shown in Figure 20.

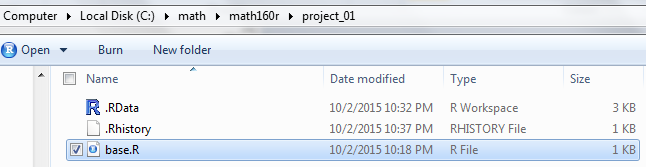
Note in Figure 20 that R has asked if it should save the workspace in our new directory. We replied y, so, after pressing Enter, let us return to Windows Explorer to look at the contents of that directory, shown in Figure 21.
The two files that we expected have been added to the directory.
If we now double click on the base.R file, we will cause RStudio to start again. When it does we will see the new "splash screen", shown in Figure 22.
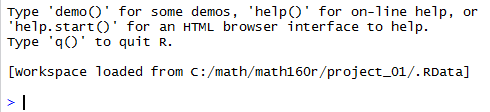
This time R reports that has loaded the workspace. And, an examination of the Environment pane, shown in Figure 23, shows that indeed our variable a has been restored.

Before we go on, we will define a new variable, b by giving it the value 11. Then we will quit R again, but this time we will respond to the question of saving the workspace with the answer n. This is shown in Figure 24.

Comparing Figure 25 to Figure 21 we notice that the time stamp for the .Rhistory file has changed. We will have to discuss that on a different web page.
©Roger M. Palay
Saline, MI 48176 October, 2015