Install software on Mac from USB drives
Return to Topics page
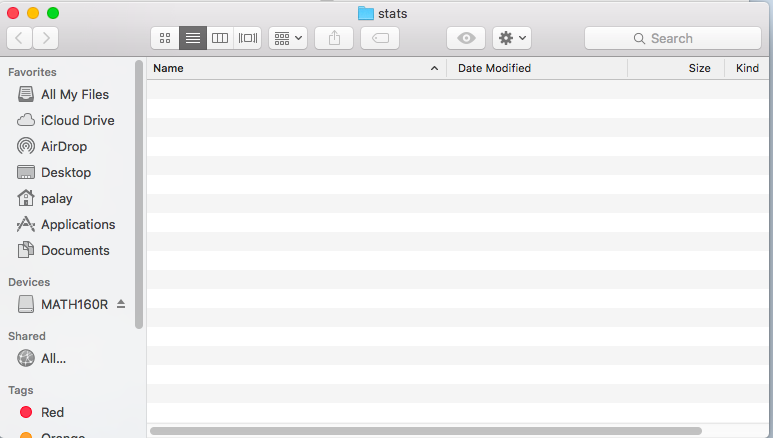
The first thing we need to do is to check on the level of the operating system running on our Mac.
To do this, click on the apple symbol in the upper left corner of the screen.
That opens the window shown in Figure 1.
Figure 1
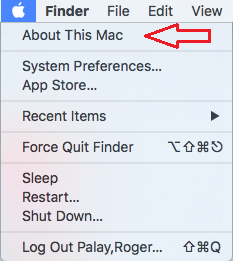
In that window, click on "About This Mac" to open a window similar to the
one shown in Figure 2.
Figure 2
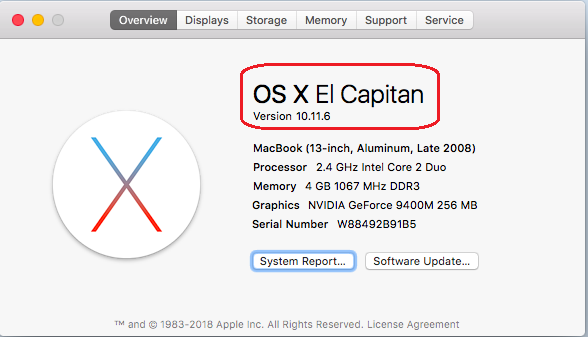
I have highlighted the important information that we need to move forward.
In particular, the Mac used here was running the "El Capitan" version of the operating
system. Note that the numeric version of this operating system is "10.11.6". If your
operating system has a lower numeric version then you will have to either upgrade to at least the
10.11.6 system or you will need special help to obtain and install earlier versions
of R and RStudio.
Continue with the installation process only in the case where your operating
system is "10.11.6" or higher.
The installation process described here has the following steps:
- Create a new "folder" on the desktop; copy all of the files from the USB
to that folder; move to that new folder; open the base mac subfolder;
then use the appropriate files there.
- Install R using the R-3.6.2.pkg file.
- Install RStudio using the appropriate "dmg" file, RStudio-1.1.463.dmg if you
are using the "10.11.6" operating system, or the RStudio-1.2.5033.dmg if you are
using the more recent version of the operating system.
- Create a new subfolder; copy "model.R" to that folder; rename the new file, then use that file
to start RStudio as a test of the installation process.
Create new folder and copy files to it.
Click on the File option on the top line of the screen. That will
open the drop-down box shown in Figure 3.
Figure 3
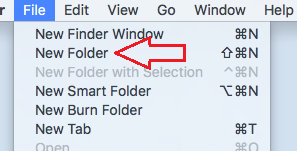
Point to the New Folder option.
Figure 4
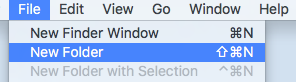
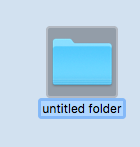
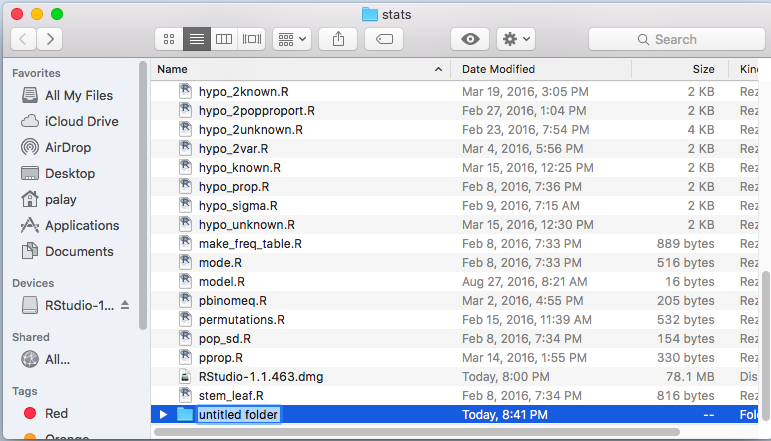
Click on that New Folder option. This will create a new folder on your home screen.
At first the folder will have the name untitled folder as shown in Figure 5.
Figure 5
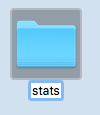
Type a new name for the new folder.
In Figure 6 I have typed the name stats for that folder.
Figure 6
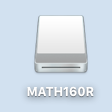
Now connect the USB provided in class to your USB port. As a result you will find
the image shown in Figure 7 on your home screen (although your image may have a different name).
The USB is recognized as a removable disk drive so the image is that of such
a disk drive.
Figure 7
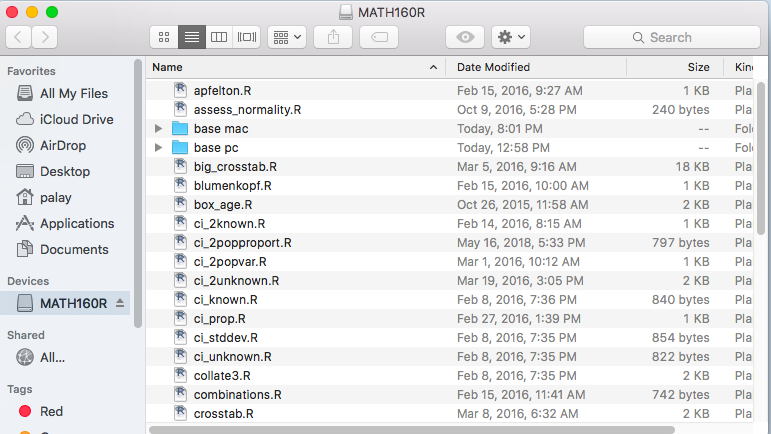
Double click on the image of the removable disk to open a Finder window
of the files on that drive. This is shown in Figure 9.
Figure 9
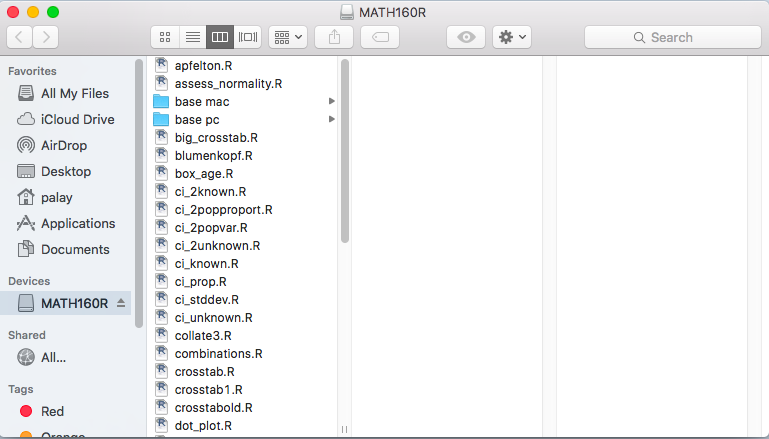
Note in Figure 9 that the display, at least on the machine used here,
is set to a mode that shows three "panes" of information. That option is indicated by the
highlighted choice,  , near the top of the window.
I prefer to use the single pane option so I have clicked on that
option,
, near the top of the window.
I prefer to use the single pane option so I have clicked on that
option,  , to produce Figure 10.
Figure 10
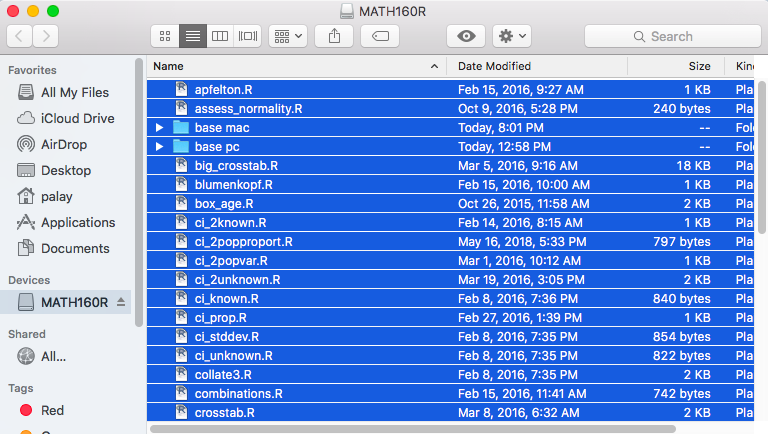
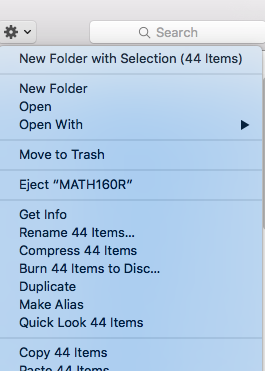
The next step is to hold down the Command key and then hit the A key to
"SELECT ALL" of the files and folders as shown in Figure 11.
Figure 11
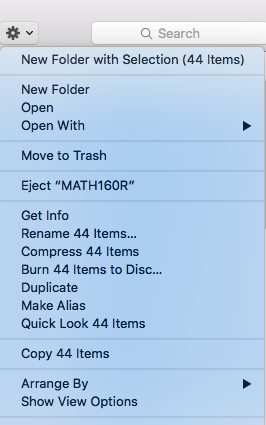
Then click on the options image,  ,
near the top of the window to display
the drop down box shown in Figure 12.
,
near the top of the window to display
the drop down box shown in Figure 12.
Figure 12
Move the cursor down to the Copy 44 items option, as shown in Figure 13.
Figure 13
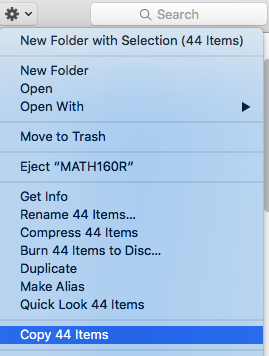
Then click on that Copy 44 items option.
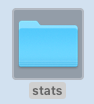
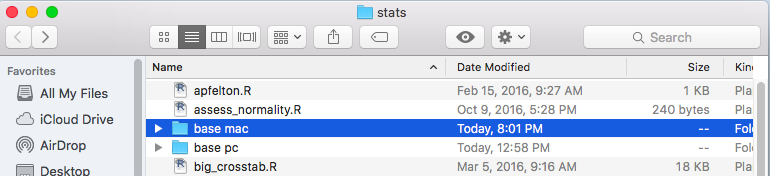
Now we will move back to the stats folder that we created on the
desktop earlier. Figure 14 shows that folder on the desktop.
Figure 14
Double click on that folder to open a Finder window showing the contents of
that folder. Since it is a new folder it has nothing in it, as shown in Figure 15.
Figure 15
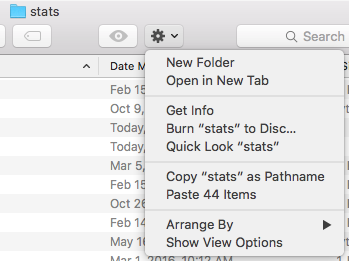
In that window click on the options icon, ,
to open the drop down box shown in Figure 16.
Figure 16
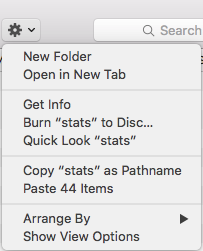
Click on the Paste 44 items option. This will paste all of the
files and folders that we copied from
the USB drive to our desktop folder. The result is shown in Figure 17.
Figure 17

At this point we are done with our USB drive. There are a number of
different ways to disconnect it from our computer.
Here we return to the folder, as shown back in Figure 7, double click on that
icon to open it in a Finder window, as shown in Figure 9,
then click on the options icon, ,
to open the drop down box shown in Figure 18.
Figure 18
In that drop down box we can find and point to the option
Eject "Math160R, although you may have a different name for that USB drive.
Figure 19
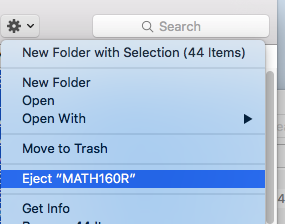
We just need to click on that Eject option. Once that is done we can
remove the USB drive and put it away as a safe backup for our files.
Install R
To install the R system we need to return to our newly created desktop
folder. Double click on that folder, if necessary, to open the Finder window
last seen in Figure 17. In that window we want to select the
base mac sub-folder, as shown in Figure 20.
Figure 20
Doubnle click on the base mac name of Figure 20 to look at
all of the files in that sub-folder, as shown in Figure 21.
Figure 21

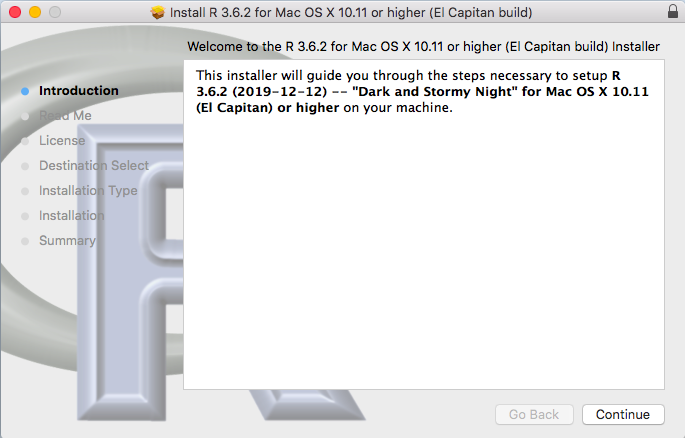
In Figure 21 we want to run the R-3.6.2.pkg fie. Therefore,
double click on that file name. This will start running the installation program for R
as shown in Figure 22.
Figure 22
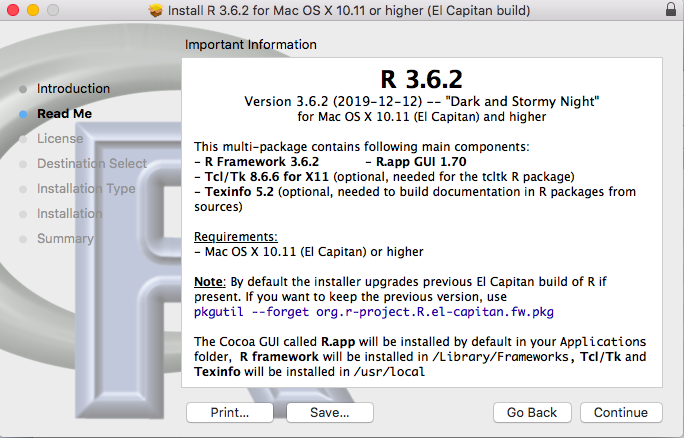
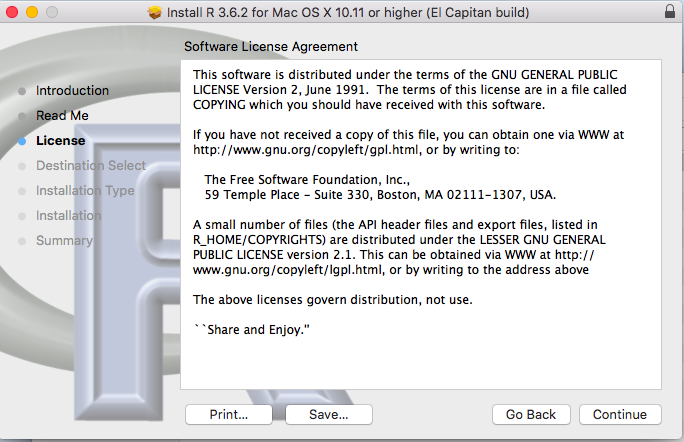
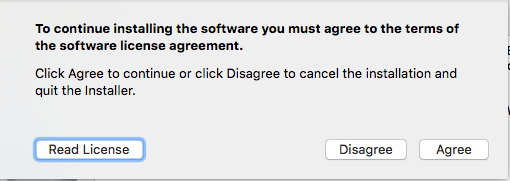
Click on the  of Figure 22
to move to Figure 23.
of Figure 22
to move to Figure 23.
Figure 23
Click on the of Figure 23
to move to Figure 24.
Figure 24
Click on the of Figure 24
to move to Figure 25.
Figure 25
Click on the  of Figure 25
to move to Figure 26.
of Figure 25
to move to Figure 26.
Figure 26
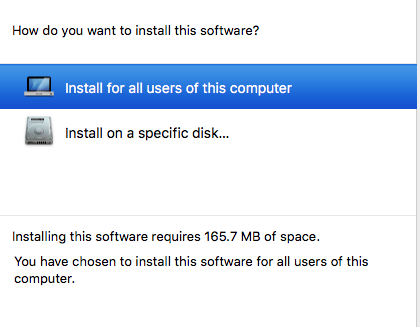
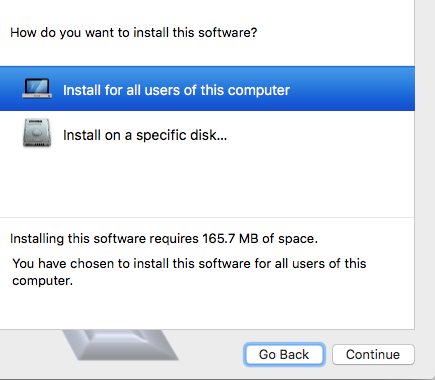
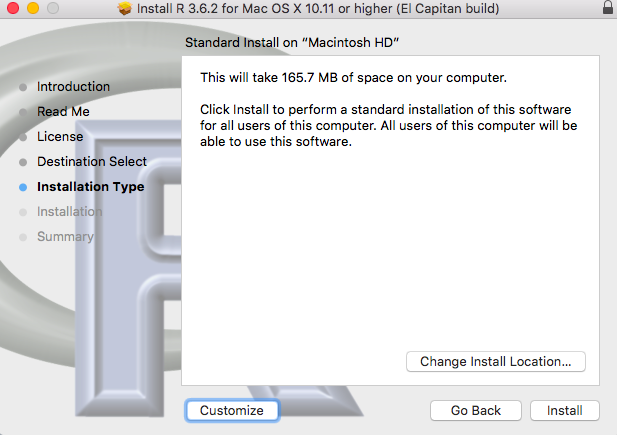
Click on Install for all users of this computer in Figure 26 to move
to Figure 27.
Figure 27
Click on the of Figure 27
to move to Figure 28.
Figure 28
Click on the  of Figure 28
to move to Figure 29.
of Figure 28
to move to Figure 29.
Figure 29
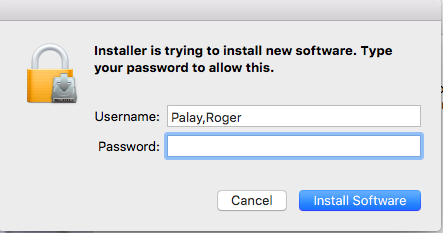
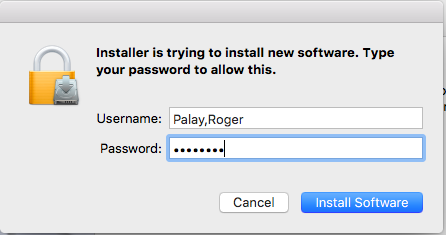
The Mac system, at least on this computer, wants a confirmation that I have permission
to use this computer. I need to supply my password for this machine, which I
did to move to Figure 30.
Figure 30
Click on the  of Figure 30
to move to Figure 31.
of Figure 30
to move to Figure 31.
Figure 31
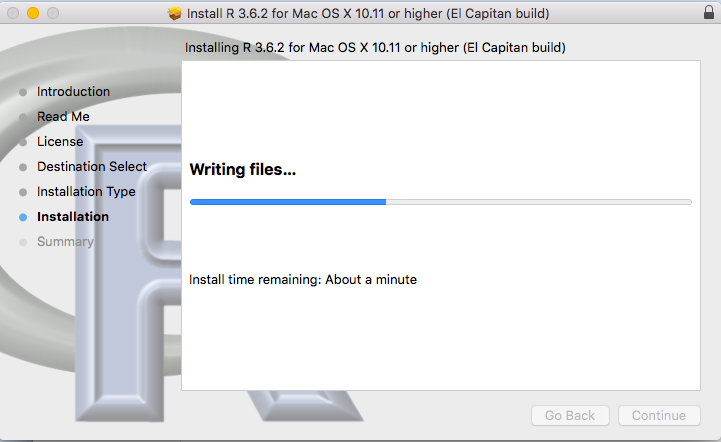
Figure 31 caught the installation process in the middle of its tasks.
If we wait, patiently, that image will change to the one shown in Figure 31.
Figure 32
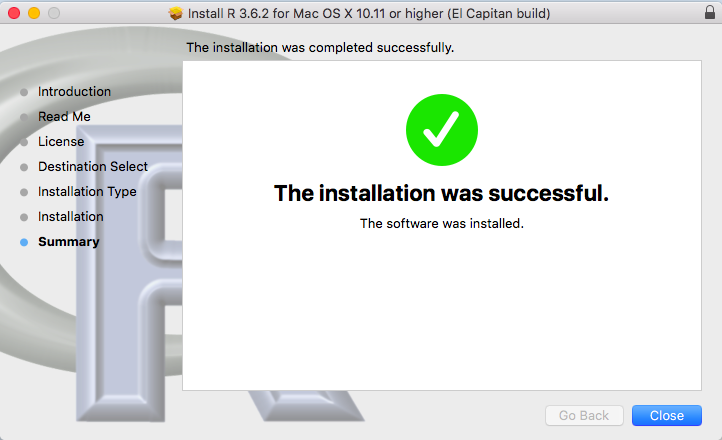
Click on the  of Figure 32
to complete the installation of R.
of Figure 32
to complete the installation of R.
Install RStudio
We should still have the Finder window showing the contents of our base mac
sub-folder displayed on the screen.
We note that there are two .dmg files. As long as your operating system
is at the 10.11.6 level or higher you can use the
RStudio-1.1.463.dmg file. However, if you are using the newer operating system
then you can use the newer version of RStudio found in
the RStudio-1.2.5033.dmg file.
Figure 33
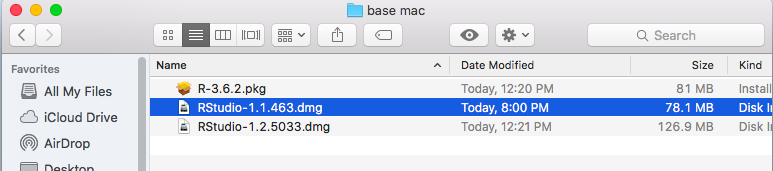
We recall that the machine used here was at the 10.11.6 level. As such,
we need to use the RStudio-1.1.463.dmg file. Double click on that file name
in Figure 33 to start the installation and move to Figure 34.
Figure 34
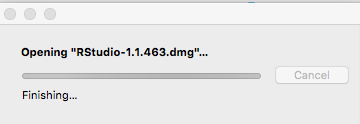
Figure 34 shows the installation going forward. As that finishes the
display changes to that shown in Figure 35.
Figure 35

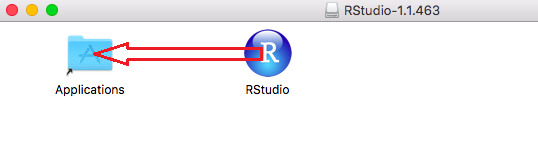
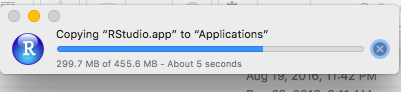
The next step is for us to put the cursor on the RStudio icon and drag and then drop
that icon into the Applications folder, an action shown in Figure 35a.
Figure 35a
You may actually see a window such as the one shown in Figure 36
following the copying of the RStudio application to the Applications folder.
Figure 36
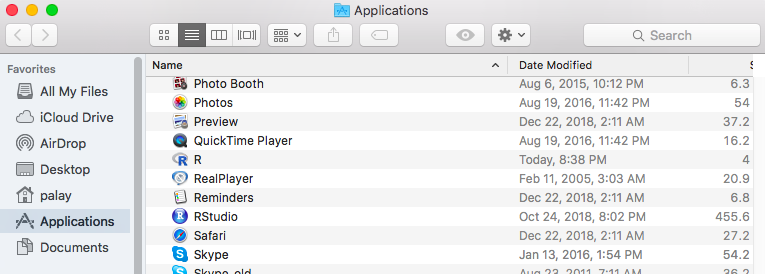
Subsequently, looking at the Applications folder
as shown in Figure 37, we can see that a copy of
the RStudio application is now in that folder.
Figure 37
That concludes the installation of RStudio.
Test the installation
The following steps will allow us to test the installation. To do this we return the
Finder window showing the contents of our desktop folder. Figure 38
shows the Finder view of our sub-folder. Click on the
 arrow to go back to
the parent folder, shown in Figure 39.
arrow to go back to
the parent folder, shown in Figure 39.
Figure 38

Click on the
arrow to go back to
the parent folder, shown in Figure 39.
Figure 39
The process we will use is the process that
you will be expected to use throughout the course to create new R script files.
We start by creating a new sub-folder in this particular desktop folder. To do this we
click on the options icon, , to get the drop down box
shown in Figure 40.
Figure 40
The option we select is New Folder. We click on that option
and the system responds by creating a new, untitled, folder as shown in Figure 41.
Figure 41
We absolutely want to give this sub-folder a name. We can just type in that name.
For this example I decided to give the folder the name of the date on which I did this,
thus we have the name 2020 Jan 06, shown in Figure 42.
Figure 42

Once I hit the Return key the Mac reorders the files and we can
see the new folder sitting at the top of the list in Figure 43.
Figure 43

The file that we will use, today and for the rest of the semester,
to set up a new R script file is called model.R. If we scroll down the
list of files shown in Figure 43 we will get to the portion of the list
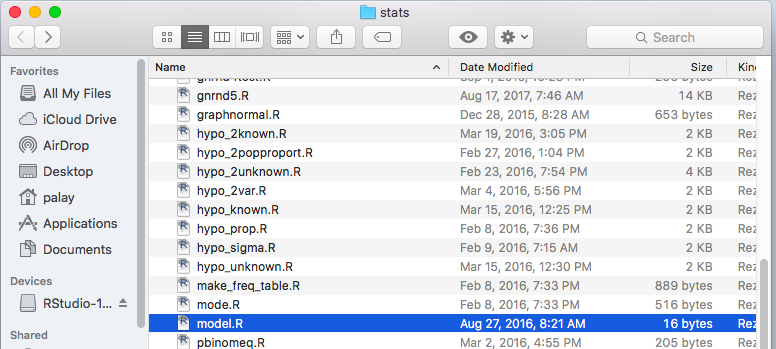
that contains model.R as shown in Figure 44. We click, once, on that
file name to make it our selected file.
Figure 44
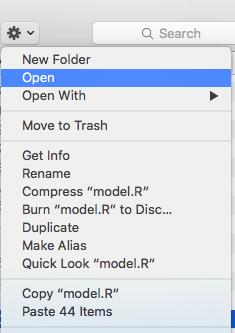
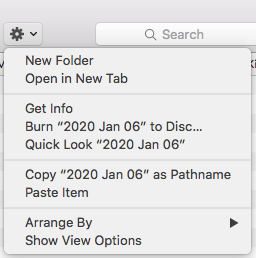
Then, click on the options icon, ,
to get the drop down box shown in Figure 45.
The option that we want is the  option.
Figure 45
Click on . Then scroll back to view
our newly created sub-folder, 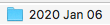 ,
as shown in Figure 46.
,
as shown in Figure 46.
Figure 46

Double click on to have Finder
display the contents of the sub-folder, shown in Figure 47.
Figure 47

Click on the options icon,
to get the drop down box shown in Figure 48.
Figure 48
Click on the  option.
The result is shown in Figure 49.
option.
The result is shown in Figure 49.
Figure 49

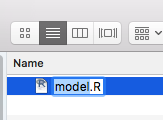
We definitely do not want this file called model.R.
We click on it once to make it the selected file, as shown in Figure 50.
Figure 50

Then click on the options icon,
to get the drop down box shown in Figure 51.
Figure 51
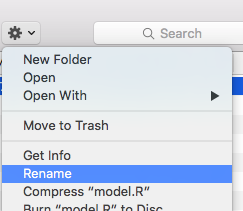
We want to select, click on, the Click on the options icon,
 option to get the image shown in
Figure 52.
option to get the image shown in
Figure 52.
Figure 52
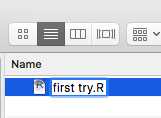
Then, type in a new name for the file. In this case I used first try.
Figure 53
Next we want to use that file to open an RStudio sesssion. However,
at this point, our Mac does not know the application that should be used to
open files ending with .R. We can teach the Mac to use RStudio.
Since our first try.R file is selected we return
to the options drop down box as shown in Figure 54.
Figure 54
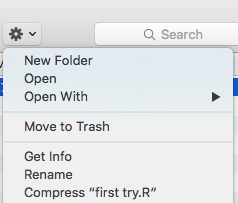
There we point to the option we want, namely
 . That causes
a new set of options to appear as shown in Figure 55.
. That causes
a new set of options to appear as shown in Figure 55.
Figure 55
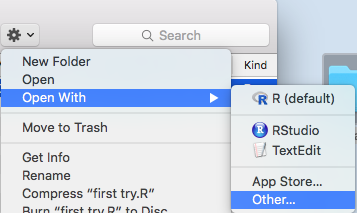
Click on the  option.
This will cause Finder to list the applications that are in the
Applications folder, as shown in Figure 56.
option.
This will cause Finder to list the applications that are in the
Applications folder, as shown in Figure 56.
Figure 56
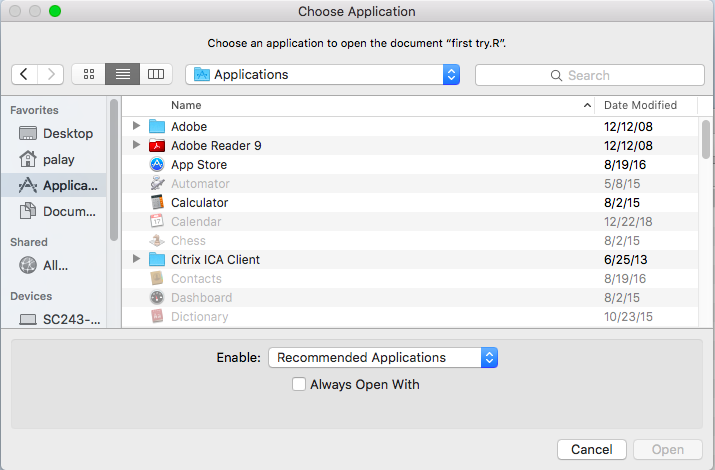
Scroll down that listing until we can see the RStudio application,
 , and click on it once to
make it the selected item, as shown in Figure 57.
, and click on it once to
make it the selected item, as shown in Figure 57.
Figure 57
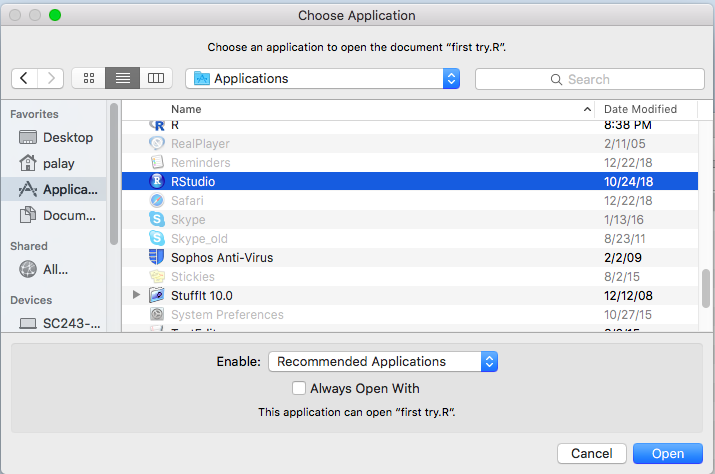
Now, be sure to check the box
 on this screen.
Figure 58
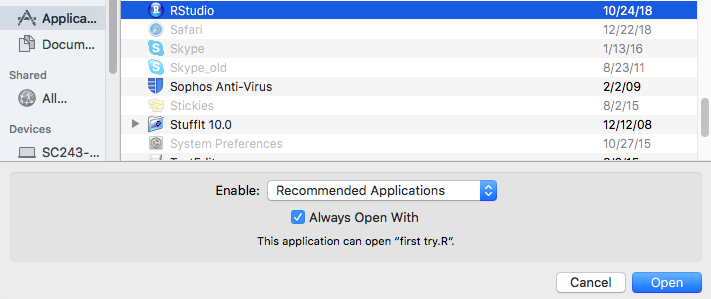
Finally, click the  button.
The system will, this first time we are running RStudio, go
through a process of verifying RStudio as shown in Figure 59.
Figure 59

Then, because the system identified that the file was originally downloaded from
a web site, it asks to be sure that you really want to run it.
Figure 60
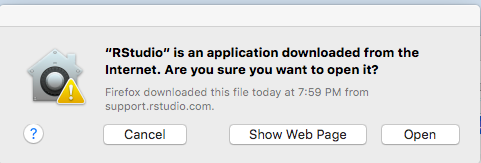
Of course, we click on the  button.
The result is shown in Figure 61.
button.
The result is shown in Figure 61.
Figure 61
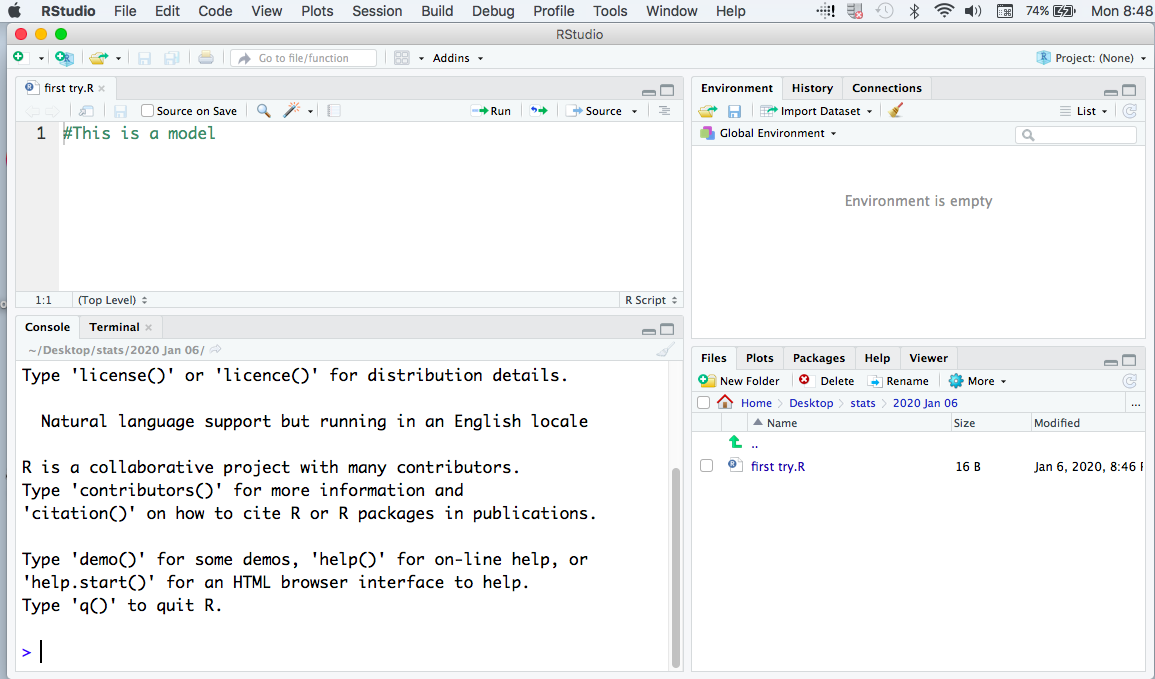
Figure 61 shows the start of an RStudio session. That concludes our software
installation and test. You can close the window shown in Figure 61 the usual way.
Return to Topics page
©Roger M. Palay
Saline, MI 48176 January, 2020