Download File
Return to Topics page
This page is intended to illustrate downloading a file from our Links
to R Scripts page to a USB memory stick, ideally,
the one given out in class.
The process is shown for each of 7 cases:
In general, our goal is to force the browser to ask us for the location
that will store the downloaded file. That way we can put the file
onto our USB drive directly.
Remember that most of the images shown here have been reduced
in size for this web page.
However, on most browsers, you can right click on the image and ask to
see it separately, in which case you will get a much larger version of the image.
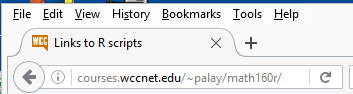
Firefox on a PC
Figure 1 shows the menu line of a Firefox window.
Figure 1
Click on the Tools option to open the dropdown menu shown in Figure 2.
Figure 2
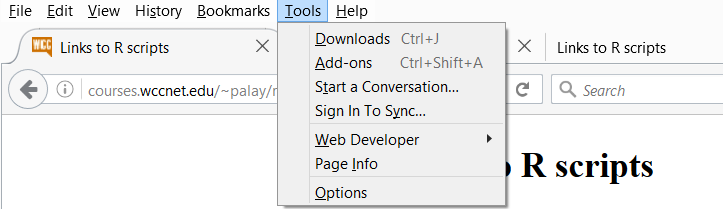
Select (click on) the Options item in that dropdown menu.
That should open a new tab, shown in Figure 3.
Figure 3
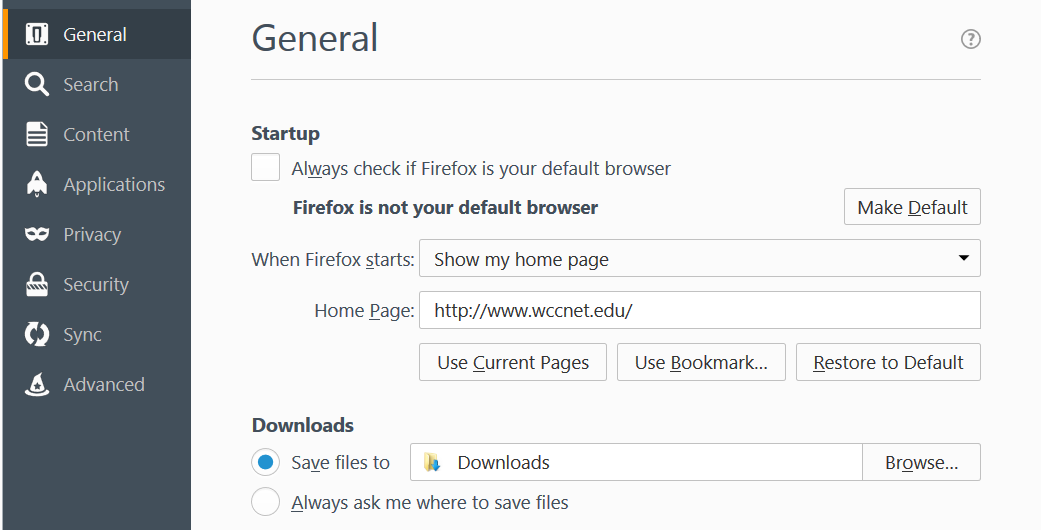
We want to change the behavior of Firefox so that we can be the one to decide
where a downloaded file should be saved.
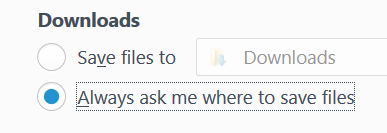
That setting is shown at the bottom of Figure 3 and is isolated in Figure 4
where we have clicked on the option to
"Always ask me where to save files".
Figure 4
At that point we can return to (or move to if need be) our web page that
provided a listing of the links to our R scripts. This is shown in Figure 5.
Figure 5
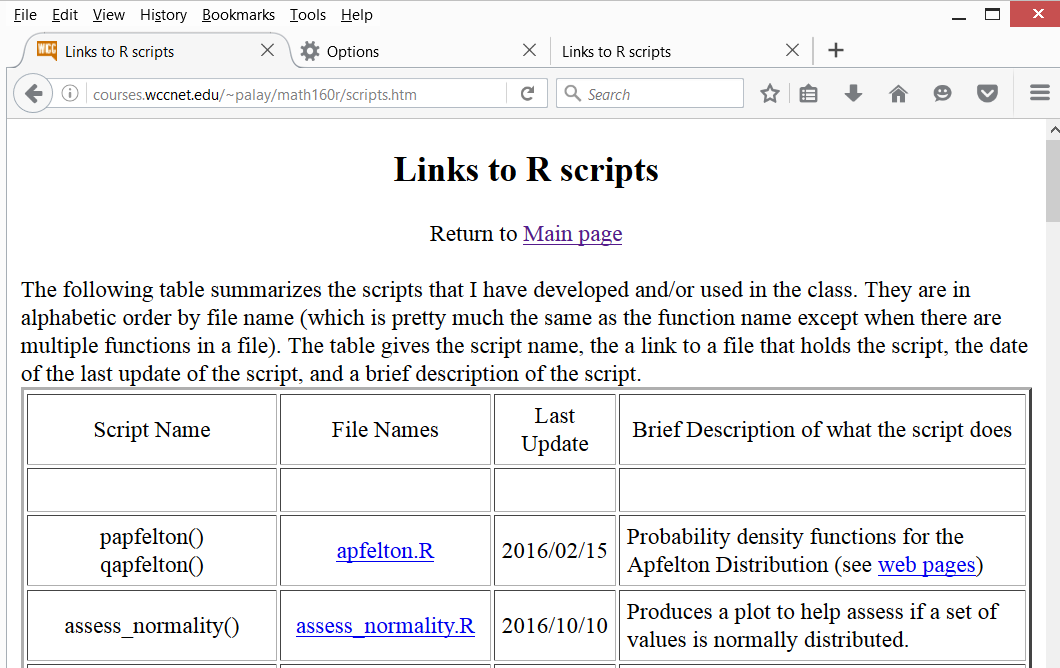
We want to download the file in assess_normality.R for this example.
Therefore we point to that file and right click on it.
This opens the pop-up
menu shown in Figure 6.
Figure 6
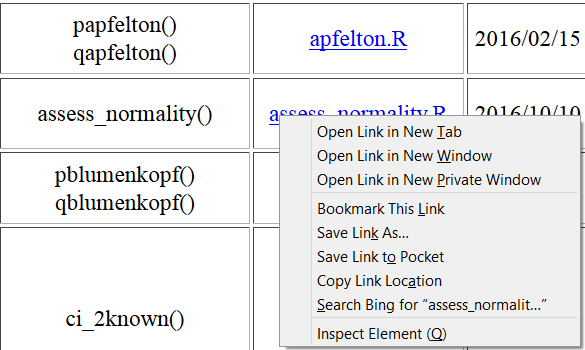
For this task we click on the Save Link as... option. This brings up the window shown in Figure 7
telling us where Firefox will save the file if we do nothing.
Figure 7
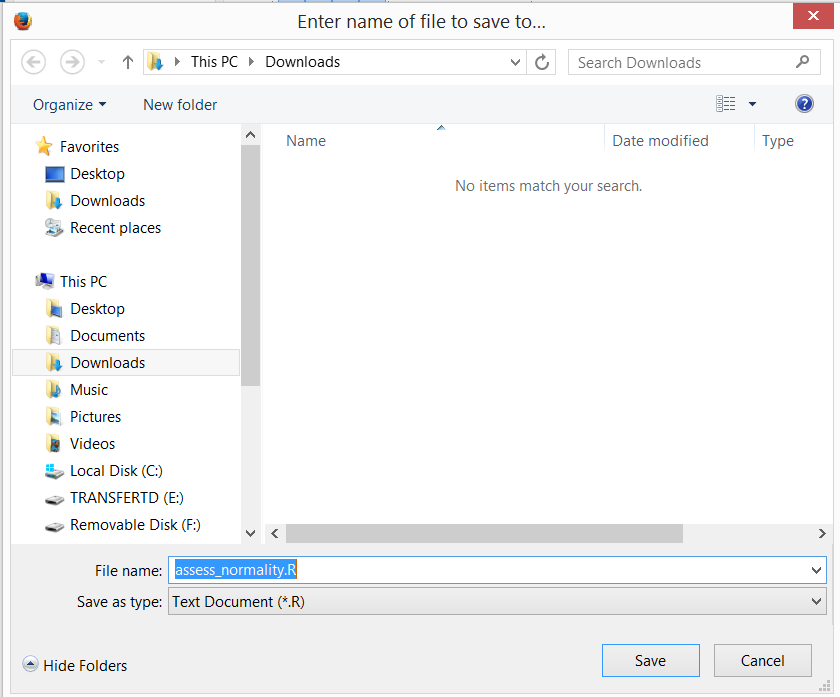
However, we want to save the file in the USB drive, noted at the left of Figure 7
as Removable Disk (F:). Therefore, we click on that name,
in the left side of Figure 7, and
Firefox responds with Figure 8.
Figure 8
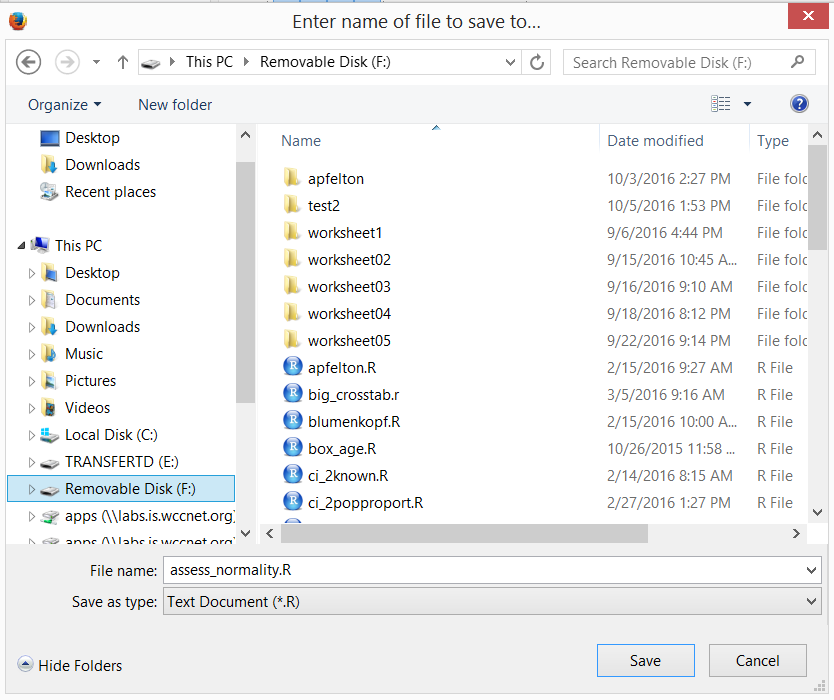
Note at the top of Figure 8 the new destination is
indeed the F: drive.
Furthermore, the current contents of that drive are shown in the window. Finally, the suggested
name for our file remains assesws_normality.R. We can accept all of that.
Therefore, we click on the Save button at the bottom of Figure 8.
Firefox will then download the file to our desired location.
Chrome on a PC
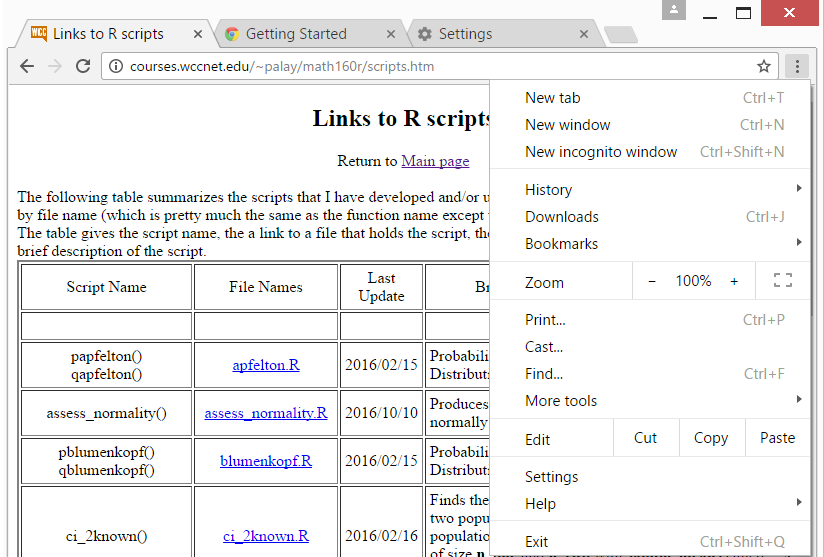
Figure 9 shows the top of a Chrome window on a PC.
Figure 9

We are interested in the vertical three dots,
 ,
at the top right of the window. Click on those three dots to open the menu
shown in Figure 10.
,
at the top right of the window. Click on those three dots to open the menu
shown in Figure 10.
Figure 10
Click on the Settings option in the
new pane shown in Figure 10 to open a new window,
the top of which is shown in Figure 11.
Figure 11
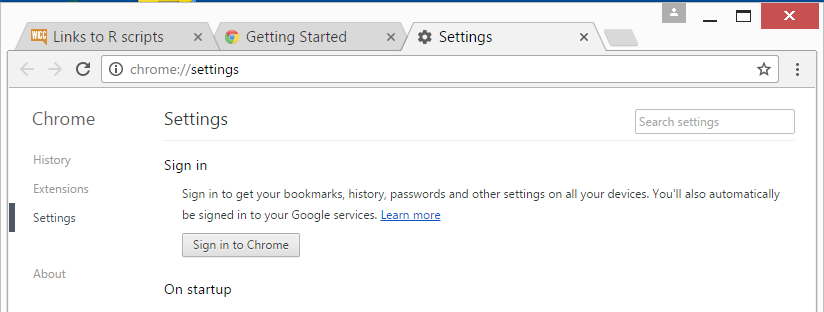
The item we want is not shown yet in that window. Instead we need to scroll
down to display the
Show the advanced settings
item,
shown in Figure 12.
Figure 12

Click on the
Show the advanced settings
item,
shown in Figure 12 and we get the new list of options,.
In that list ios the option shown in
Figure 13.
Figure 13
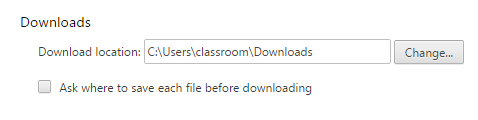
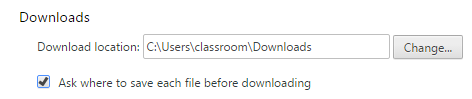
We want to be sure that the option
Ask where to save each file before downloading
is checked, as in Figure 14.
Figure 14
At that point we can move to the window that holds the
web page giving all of our R scripts.
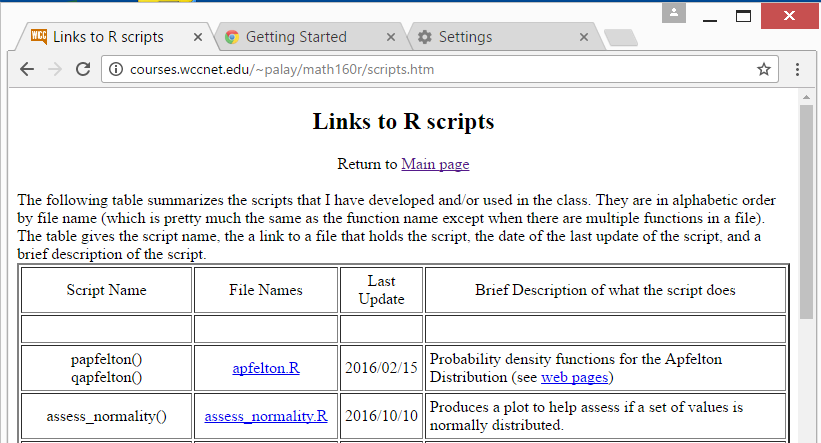
The top of that page is shown in
Figure 15.
Of those, we want to download assess_normality.R.
Figure 15
We point to the desired file and right click on the link to the file.
THis opens the pop-up menu shwon in Figure 16.
Figure 16
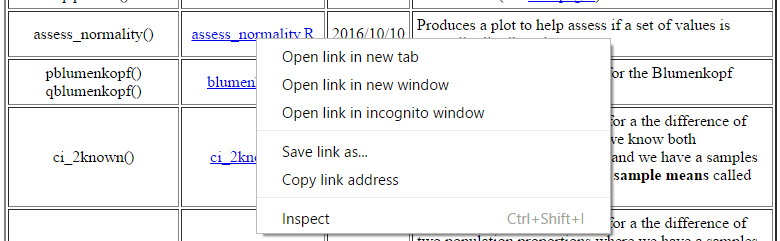
In Figure 16 we click on the Save file as... option.
Chrome responds by showing us where it will save
the file, and the name it will use. However, we can change those values.
Figure 17
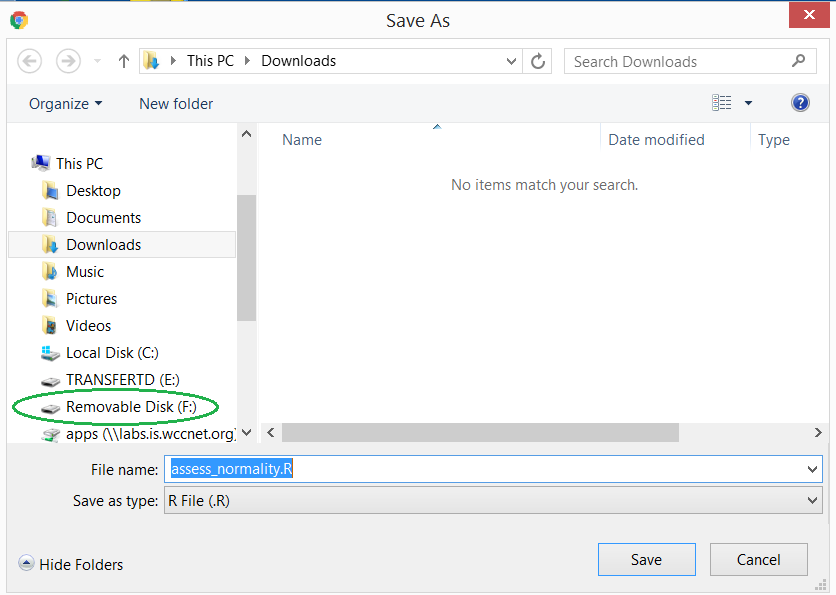
Instead of saving the file into Downloads,
as shown in Figure 17, we want to save the file
onto our USB drive, which happens to be
listed, on the left, as
Removable Disk (F:), highlighted in Figure 17.
If we click on Removable Disk (F:) in Figure 17 we get
Figure 18.
Figure 18
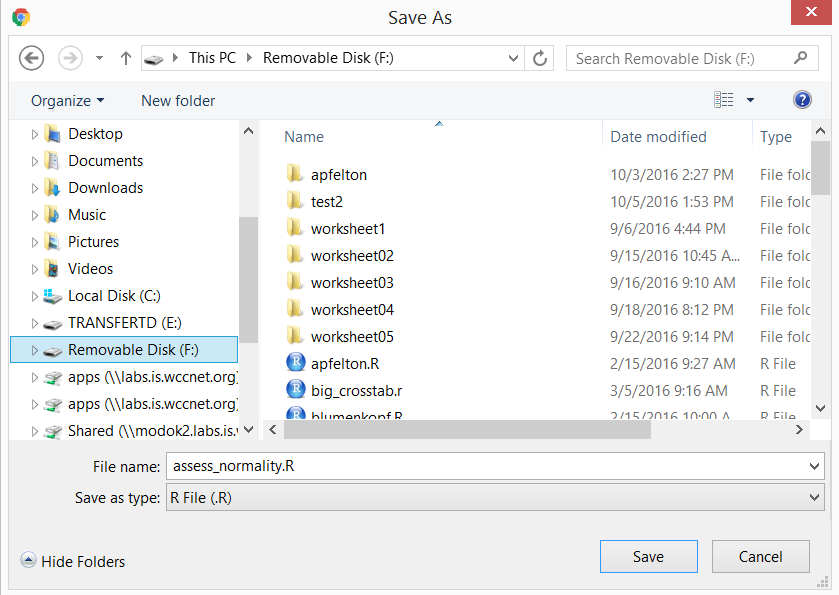
Our new location is our USB drive. We can even see some of the folders
and files that are already on the USB drive.
All we need to do now is to click on the
Save button.
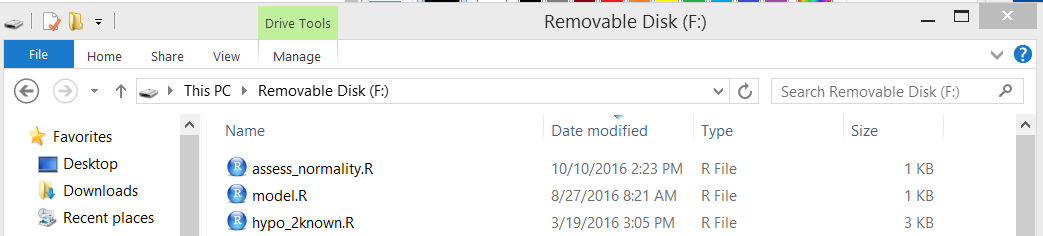
Figure 19 shows the result in the File Explorer.
Figure 19
Internet Explorer on a PC
Figure 20 shows the top of the Internet Explorer window.
Figure 20

We want to look at the settings.
To do this we can click on the gear,
 at the far
right of the window.
This opens the pane shown in Figure 21.
at the far
right of the window.
This opens the pane shown in Figure 21.
Figure 21
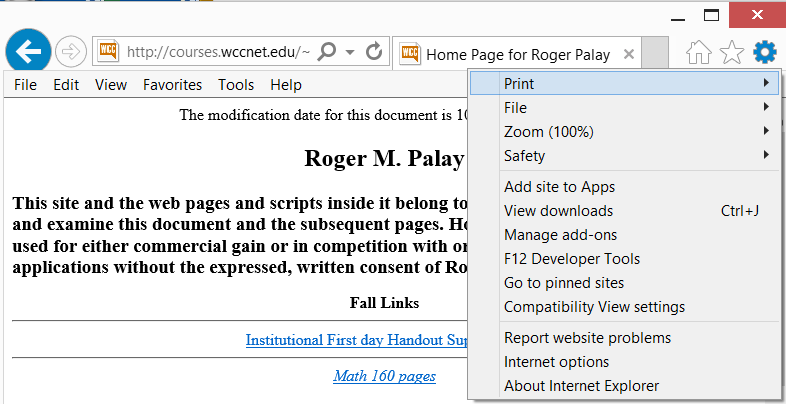
On Figure 20 we click on the View Downloads option.
This opens a new window, shown in Figure 22.
Figure 22
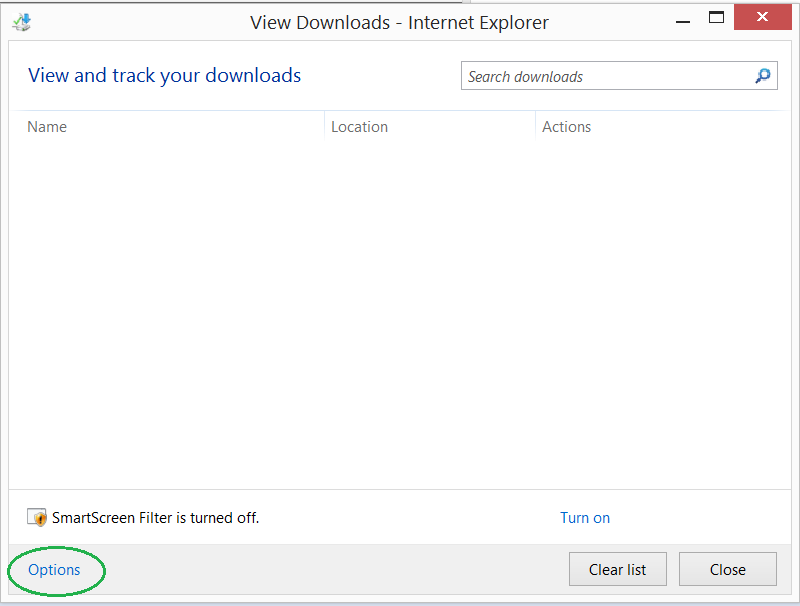
There we select the Options
item at the lower left corner. This brings up the window
shown in Figure 23.
Figure 23
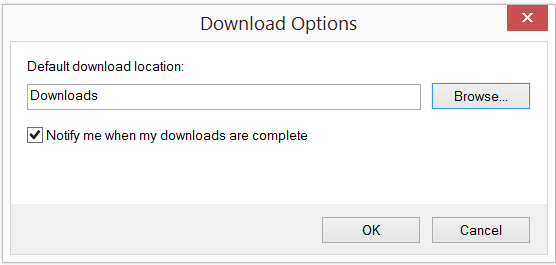
There is no option to force Internet Explorer to
ask us where to save each downloaded file (it seems to do this in every case).
But we can
select the default location right here.
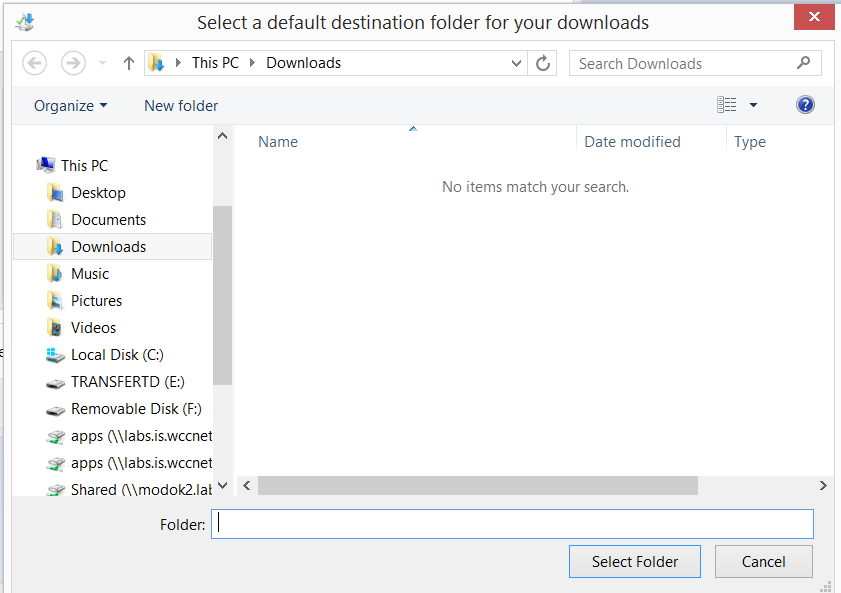
As shown in Figure 24, the current default directory is
the Downloads folder.
Figure 24
We can change that to be our USB drive, which we know to be
Removable Drive (F:), by clicking on that
folder in the left pane.
Doing so not only changes the default to be that location
but also displays the current directory structure on that
USB drive. This is shown in Figure 25.
Figure 25
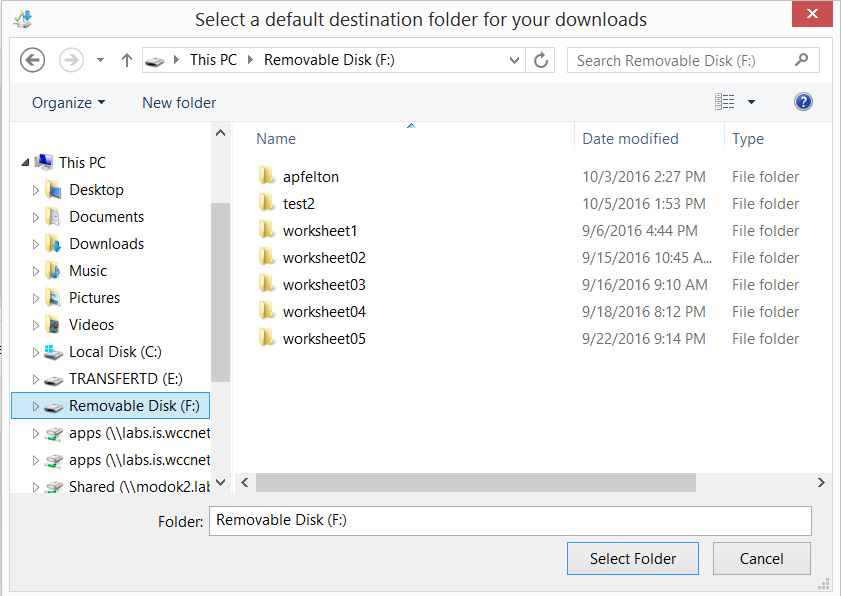
To leave the window in Figure 25 we click on the Select Folder
button.
Returning to the web page that lists our R scripts, shown in Figure 26,
we locate the link to the file we want to download.
Figure 26
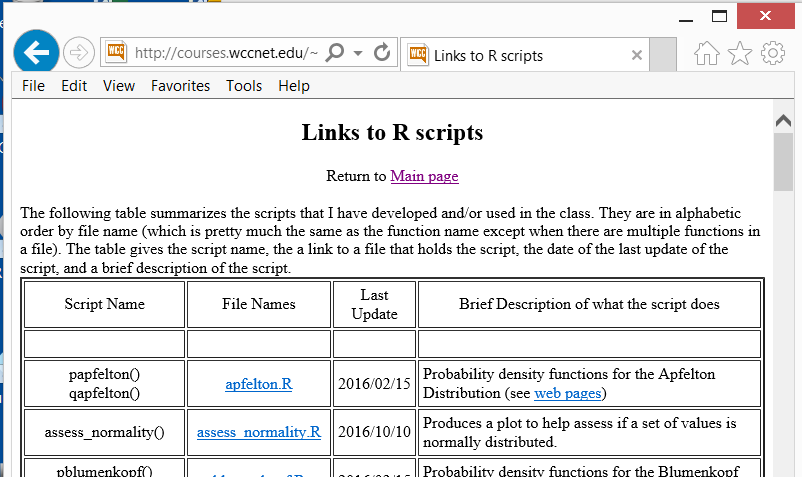
In this example, we want to download the assess_normality.R
script.
When we right click on that link we get the pop-up menu shown in Figure 27.
Figure 27
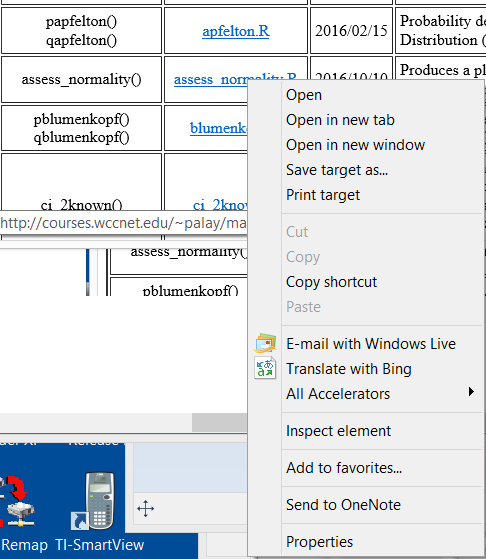
From the options shown in Figure 27 we click
on the Save target as... option.
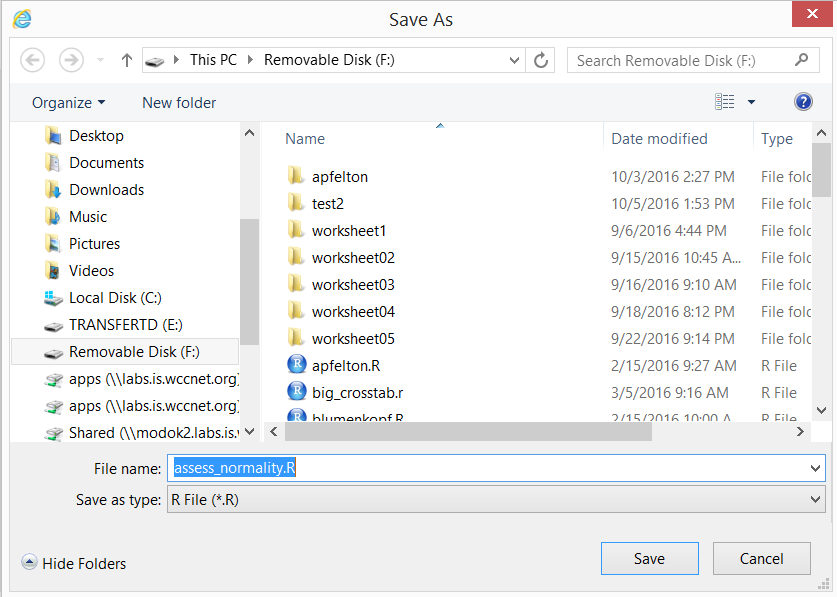
This opens the window shown in Figure 28.
That download location, set above in Figure 25,
is just where we want the file.
Figure 28
Click Save to complete Figure 28.
Internet Explorer then displays the confirmation that the
file has been downloaded.
Figure 29

We need not take any of the three button
options at this point and, instead, we can just close this small window.
Safari on a Mac
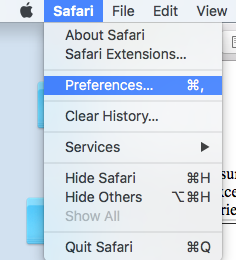
Figure 30 shows the top of the Safari window on a Mac.
Figure 30

Point to and click on the Safari item in the menu bar.
This displays the dropdown menu shown in Figure 31.
Figure 31
There we click on the Preferences option.
This opens the window shown in Figure 32.
Figure 32
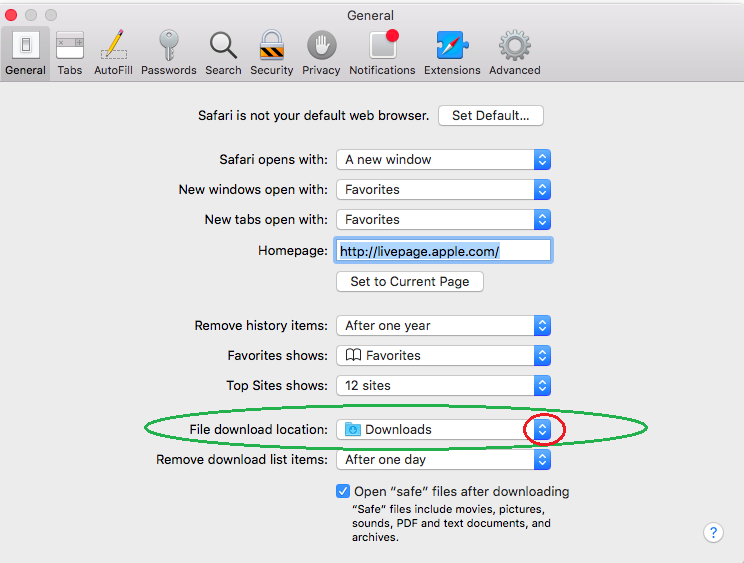
In the File download location line (highlighted in the
green oval) we want to select the options
button,  (highlighted in the
red circle).
When we click on that button we get a window containing the options
shown in Figure 33.
(highlighted in the
red circle).
When we click on that button we get a window containing the options
shown in Figure 33.
Figure 33
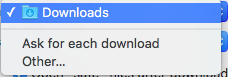
There we select the Ask for each download option.
Doing so returns us to the screen shown in Figure 32,
but now the File download location:
line has been changed as shown in Figure 34.
Figure 34

Once that is done we can
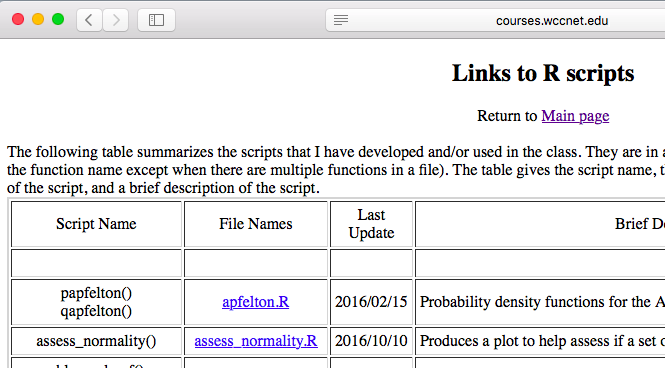
return to the window listing our R scripts,
shown in Figure 35.
We point to our desired script, assess_normality.R
and right click on that link.
Figure 35
This will open the popup menu shown in Figure 36.
Figure 36
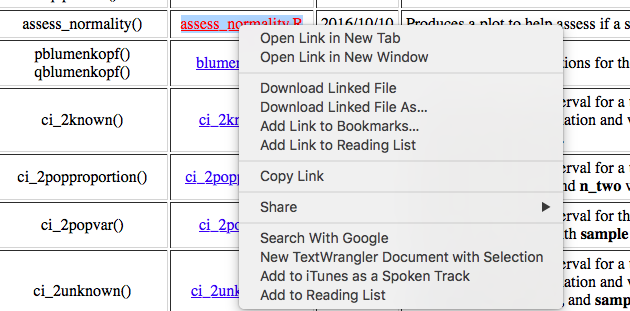
There we select the Download Lined File
option.
Because we had set Safari to always ask for the download location, it
now displays Figure 37.
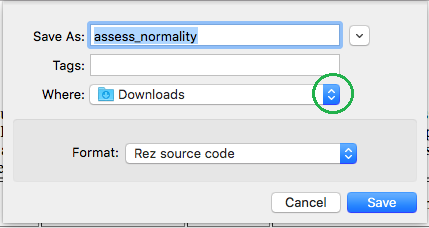
Figure 37
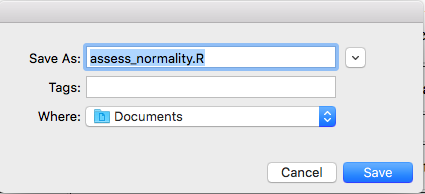
To move the location away from the Documents
default, click on the
button on that line.
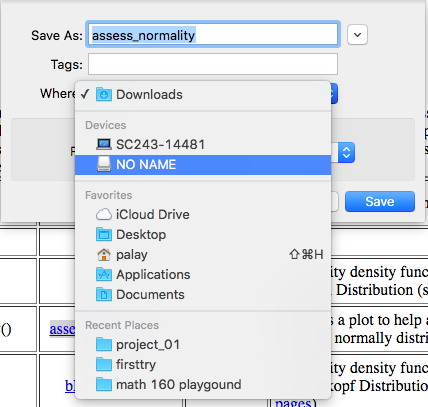
This produces the drop down menu shown in Figure 38.
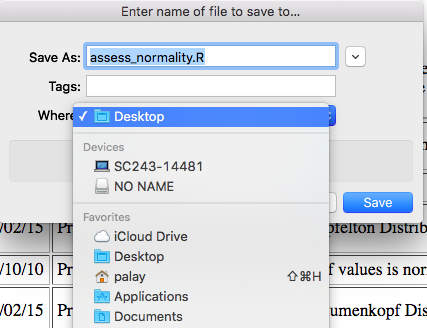
Figure 38
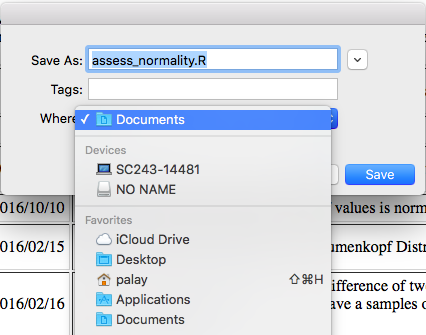
In that menu, shown in Figure 38, we see our desired location,
namely the NO NAME item.
Click on that item.
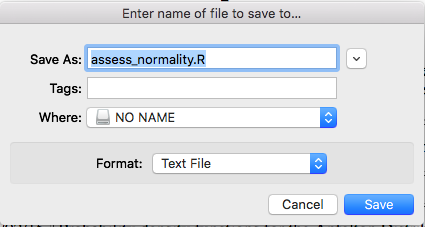
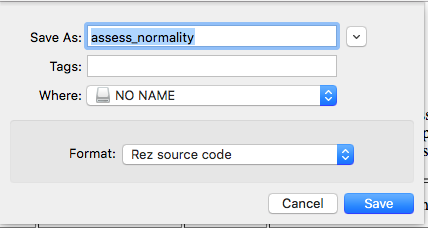
This returns us to the image first shown in Figure 37 but now it has been changed to
show the NO NAME location.
Figure 39
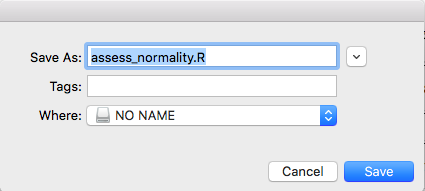
Click on the Save button to complete the process.
Firefox on a Mac
Figure 40 shows the heading of the Firefox window on a Mac.
Figure 40
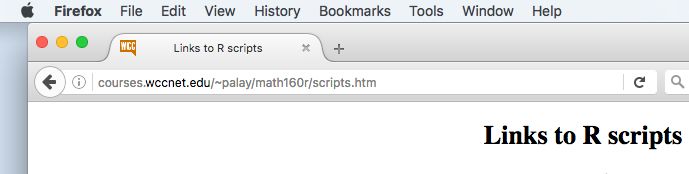
Click on the Firefox name and
a drop down menu appears, as in Figure 41.
Figure 41
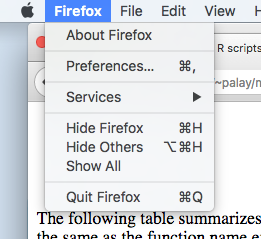
In that menu, click on the Preferences
option. That will open a new window, as is shown in Figure 42.
Figure 42
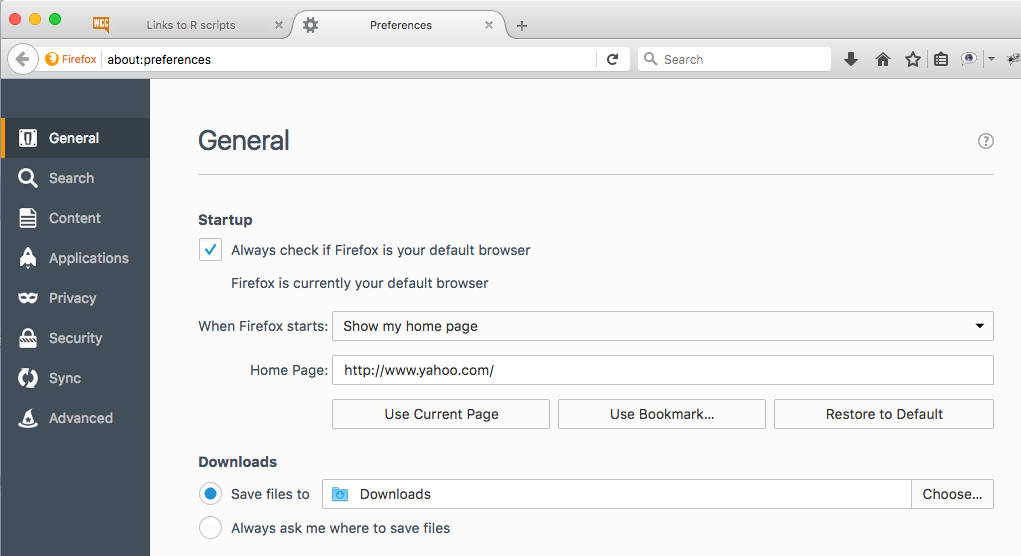
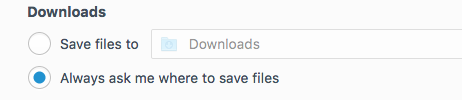
In the Downloads section make sure that the option
Always ask me where to save files is checked, as in
Figure 43.
Figure 43
Once that is done we can return to the window showing
us the R scripts that
are available for downloading.
Figure 44 shows that page.
Figure 44
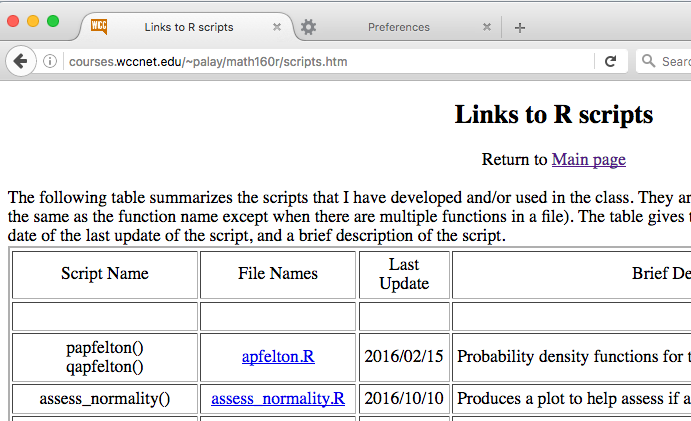
We are interested in downloading assess_normality.R.
Therefore, point to that link and right click on it.
This causes Firefox to display the drop down menu
shown in Figure 45.
Figure 45
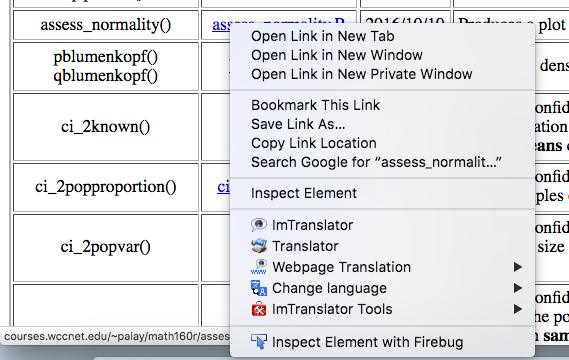
In that menu select the Save Link As ... item.
That will bring up the window shown in Figure 46.
Figure 46
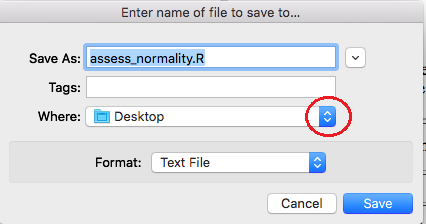
Click on the button, circled in
red in Figure 46.
That will bring up the display shown in Figure 47.
Figure 47
There we can click on the NO NAME item.
As a result, the window we saw in Figure 46 comes back
as Figure 48.
Figure 48
At that point we can just click on the Save
button and the file will be downloaded and saved to our USB drive.
Chrome on a Mac
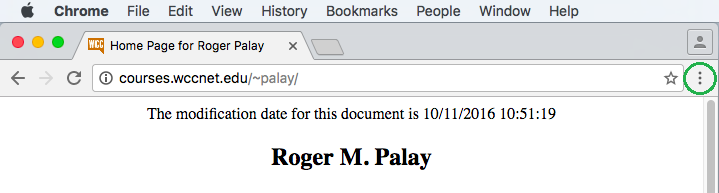
Figure 49 shows the top of the Chrome window
where we have highlighted the three dots,
, at the right end of the window.
Figure 49
Click on that item to bring up the menu shown in Figure 50.
Figure 50

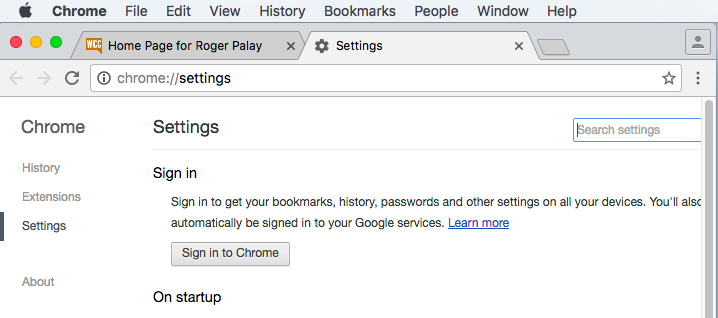
Now click on the Settings option to open
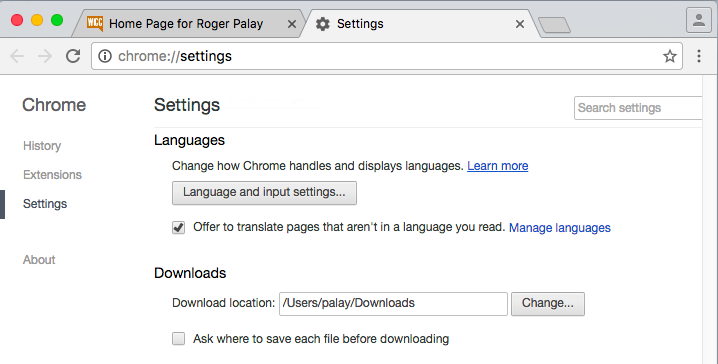
the new window, the top of which is shown in Figure 51.
Figure 51
If we scroll to the bottom of that screen
we find the Show advanced settings option.
Figure 52

Click on the Show advanced settings
to bring up a new window, shown in Figure 53.
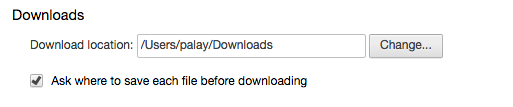
Figure 53
Be sure that the Ask where to save each file before downloading
option is checked, as it is in Figure 54.
Figure 54
At that point we are done with the settings and we can
return to the web page listing all of our R
script files.
Figure 55
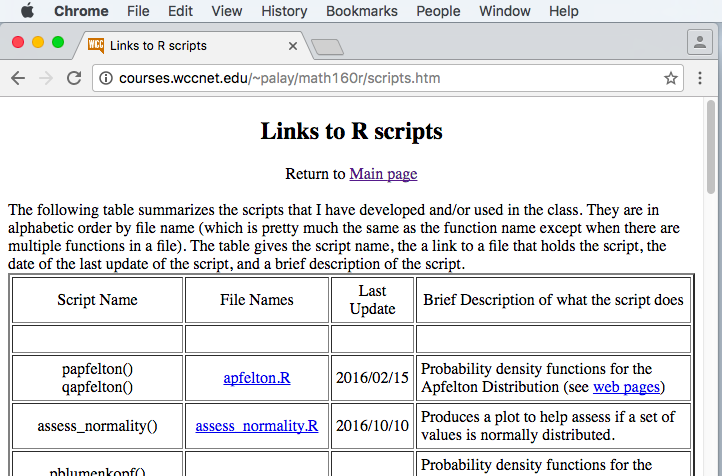
The file we want to download is assess_normality.R.
Point to the link for that file and right click on it. This opens
the pop-up menu shown in Figure 56.
Figure 56
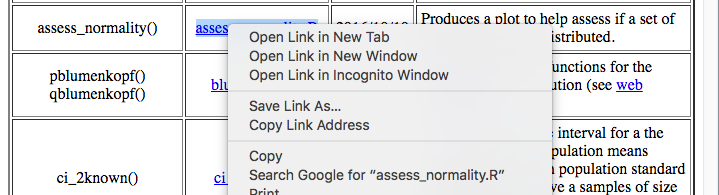
Click on the Save Link As... option
to bring up the window shown in Figure 57.
Figure 57
Click on the button, circled in
green in Figure 57.
That will bring up the display shown in Figure 58.
Figure 58
There we can click on the NO NAME item.
As a result, the window we saw in Figure 57 comes back
as Figure 59.
Figure 59
At that point we can just click on the Save
button and the file will be downloaded and saved to our USB drive.
Edge on a PC
Figure 60 shows the top of the Microsoft Edge window
augmented by highlighting the three dots,
 , at the
upper right of the window.
, at the
upper right of the window.
Figure 60

Click on those three dots,
,
to bring up the window shown in Figure 61,
augmented by highlighting the Settings
item.
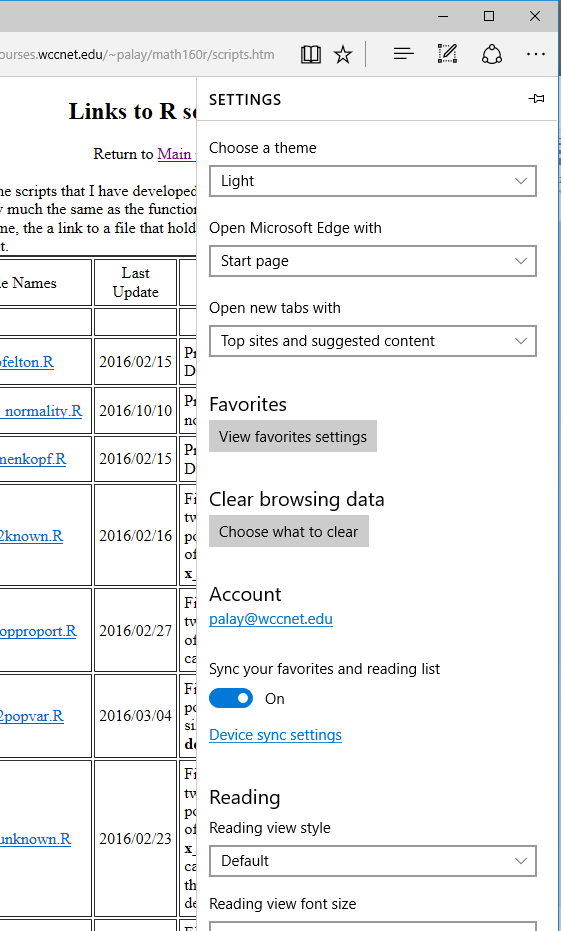
Figure 61
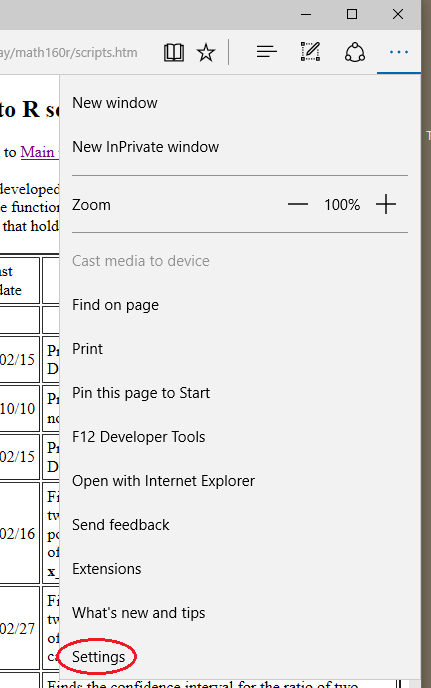
Click on the Settings option. This changes
the window to that shown in Figure 62.
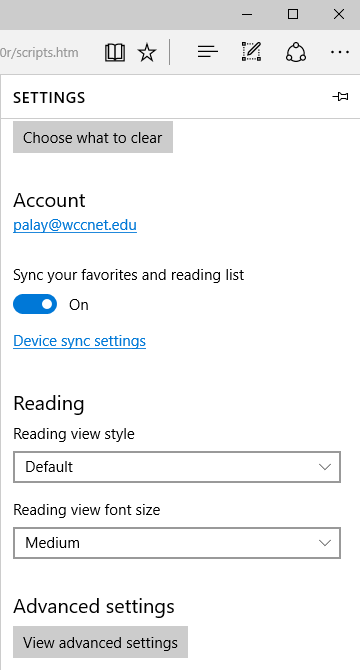
Figure 62
Scroll down to the bottom of that window to find the
View advanced settings option, shown in Figure 63.
Figure 63
Click on the
View advanced settings option
to bring up the pane shown in Figure 64.
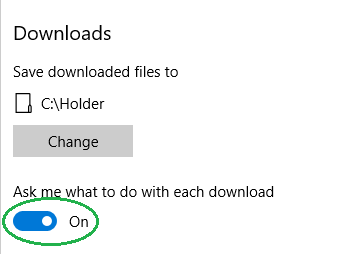
Figure 64
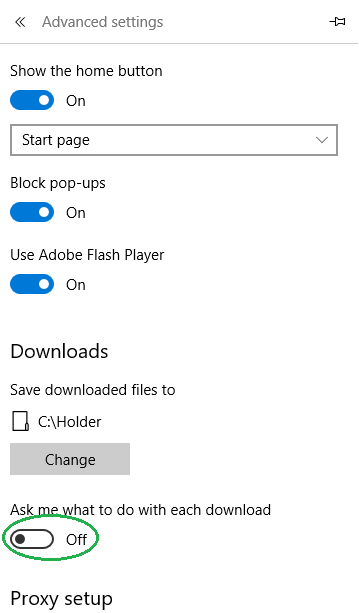
Be sure that the switch for Ask me what to do with each download,
in the green oval in Figure 64,
is in the On position. If it is in the Off position, as in
Figure 64, then click on the right side of the switch,
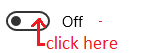 , to change
the display to that shown in Figure 65.
, to change
the display to that shown in Figure 65.
Figure 65
Now we can return to the window showing the R
scripts links.
Figure 66
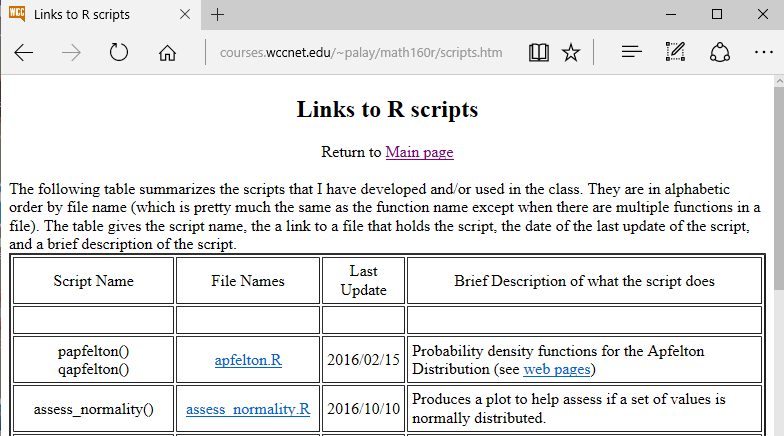
The link we want is the assess_normality.R
link. Point to it and right click on it to open the selection
shown in Figure 67.
Figure 67
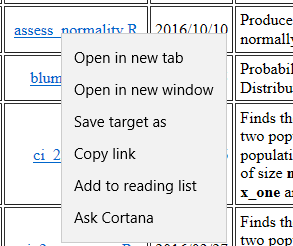
Click on the Save target as option.
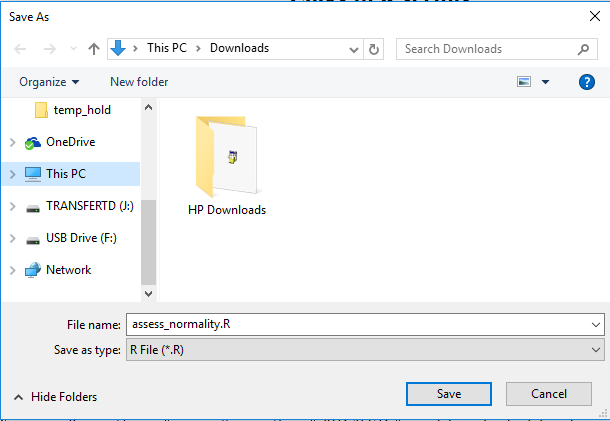
This opens the window shown in Figure 68.
Figure 68

In the left pane in that window, scroll down until
you find the name of the USB drive on which we want to store our download.
On this machine that drive appears as USB Drive (F:),
as can be seen in Figure 69.
Figure 69
Click on the name of the USB drive. That will change the window so that it appears as
in Figure 70.
Figure 70
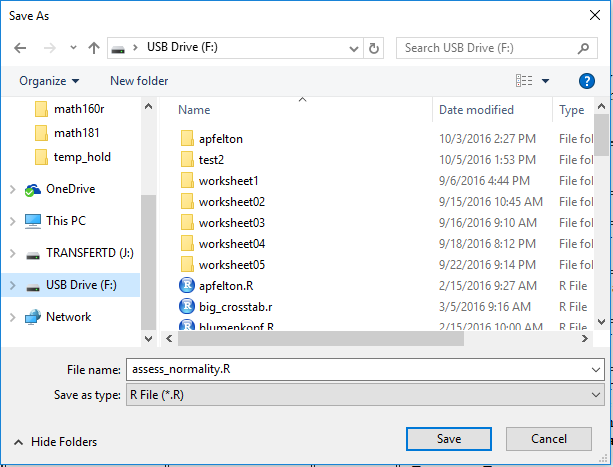
Now we just need to click on the Save button to download the file
to our desired location.
Return to Topics page
©Roger M. Palay
Saline, MI 48176 October, 2016